To excel in your DIY solar projects, investing in quality tools is essential. You'll need high-quality cable cutters and strippers for precise work, along with reliable soldering tools for strong connections. Measurement tools like DC meter clamps guarantee accuracy during installation. Don't overlook versatile hand tools such as screwdrivers and drill bits tailored for different tasks. These tools may cost more upfront but provide long-term value and reliability, minimizing future replacements. Equipped with the right tools, you can commence successful solar installations. Stick around, and you'll uncover more tips and insights for your DIY solar journey!
Key Takeaways
- Invest in high-quality cable cutters and strippers for clean cuts and reliable connections in your solar projects.
- Utilize specialized tools like ratcheting and hydraulic crimpers to ensure consistent performance with larger gauge wires.
- Choose reliable soldering tools and leaded solder to create strong, durable connections for your solar system.
- Incorporate energy-efficient solutions, such as heat pumps, to maximize the performance of your solar installation.
- Regularly check and maintain connections using proper tools to prevent costly repairs and enhance system reliability.

WEKESIGO 3 in 1 Adjustable Wire Stripper Tool, Automatic Solar Cable Stripper/Cutter for 2.5/4/6mm14-10 AWG Solar Wire
【Accurate】The blade is made of SK5, sharp and durable, featured with precise stripping holes,it is easy to remove…
As an affiliate, we earn on qualifying purchases.
As an affiliate, we earn on qualifying purchases.
Solar Project Planning Essentials
When you kick off a DIY solar project, planning is your first priority. You need to conduct extensive research on solar power components and systems, similar to how email and communication security requires careful preparation to protect against vulnerabilities.
Create a detailed plan that outlines all necessary steps and purchases to guarantee a smooth execution. Start by understanding your power needs; essential appliances like refrigerators can considerably impact your energy requirements and influence your setup design.
Utilizing 2D mockups helps you visualize the layout of your solar installation, which can prevent potential design flaws before construction begins. Keep in mind that budget considerations are vital. Initial setups can range from $500 to $700, so prioritize essential components first.
Consider gradual upgrades to manage costs effectively while still achieving your energy goals. Engaging with online communities, such as the DIY Solar Forum, can enhance your learning and keep you motivated.
You'll find shared experiences and troubleshooting advice that can make the process easier and boost your confidence. Remember, while some solar systems are easy to install, having a solid plan and understanding your needs will make your DIY solar project a success.

DIY FM Radio Kit and Solar Fan Kit, Electronic Science Project with PCB, Speaker, Case, Assembly Tools,Gifts for smart Kids
EDUCATIONAL KIT: Complete DIY FM radio assembly kit includes PCB board, speaker, antenna, wooden case, and all necessary…
As an affiliate, we earn on qualifying purchases.
As an affiliate, we earn on qualifying purchases.
Understanding Your Budget

When you're planning your DIY solar project, understanding your budget is vital.
You'll want to break down your initial investment, prioritize essential components, and consider long-term costs to avoid surprises down the road.
Additionally, exploring alternative investment strategies, such as a Gold IRA, can provide financial stability and potential capital appreciation to support your solar endeavors.
Initial Investment Breakdown
Understanding your budget for a DIY solar project is vital to successfully steering the initial investment. Typically, the initial setup costs range from $500 to $700, covering basic components necessary for a functioning system.
When planning your budget, you'll find that essential components like SOK batteries ($1,530), solar chargers ($400), and inverters ($300) greatly affect the overall investment. It's also important to remember the financial principle of budget management, which emphasizes the need for careful tracking of income and expenses in your project planning.
Don't forget to account for additional accessories, such as wires and connectors, which can add up to $200. These small parts can make a big difference, so it's vital to budget for everything.
To help reduce initial costs, consider exploring second-hand components. You can often find reliable, pre-owned items that still provide the necessary functionality for your solar system.
Prioritizing Essential Components
Prioritizing fundamental components in your DIY solar project can make a significant difference in staying within budget. With initial solar setup costs typically ranging from $500 to $700, it's essential to assess your long-term energy needs to inform your initial investment.
Focus on the most important components first, such as batteries and inverters, which are crucial for effective energy storage and conversion. Additionally, make sure your project environment is ideal by minimizing external pollutants, similar to how air quality considerations can enhance the performance of air purifiers.
To manage expenses, consider gradual upgrades that allow you to spread out costs while still meeting your immediate power requirements. This approach not only eases your budget constraints but also gives you the flexibility to adapt your system as your energy needs grow.
Don't overlook the importance of accessories like wires and connectors, as they can add up to $200 to your overall budget. Planning for these costs guarantees you have a thorough understanding of your spending.
Additionally, exploring second-hand components can help reduce costs without compromising quality and performance, allowing you to prioritize fundamental components effectively.
Long-term Cost Considerations
Budgeting for your DIY solar project is essential if you want to avoid financial strain down the line. Start by considering the initial investment, which can range from $500 to $700. You'll want to prioritize essential components that meet your needs without breaking the bank.
To help you plan effectively, here are four key considerations:
- Essential Components: Focus on what you need first. This will keep initial costs manageable. Additionally, researching best ways to make money online can provide insights into potentially funding your project through side gigs.
- Gradual Upgrades: Spread expenses over time. You can start with a basic system and enhance it as your budget allows.
- Second-Hand Components: Explore second-hand options. They can markedly lower costs while still providing functionality.
- Accessories Budget: Don't forget accessories. Wires and connectors can add up to $200, so include them in your overall budget.

Klein Tools CL910 2000V 2000A AC/DC Auto-Ranging Digital Clamp Meter with TRMS, Worklight, Backlit Display, Solar Panel Wind Turbine High Voltage Testing
HIGH VOLTAGE CAPABILITY: Measures DC voltage up to 2000V for demanding applications including power distribution networks, solar panel…
As an affiliate, we earn on qualifying purchases.
As an affiliate, we earn on qualifying purchases.
Key Component Selection
When selecting key components for your DIY solar project, focus on essential items like solar panels and batteries that can boost your system's efficiency.
Additionally, consider the benefits of diversifying your investment in renewable energy technologies, as investment strategies can maximize your long-term returns.
You also need to assess your power requirements to guarantee everything from your refrigerator to your chargers runs smoothly.
Essential Solar Components
Selecting the right solar components can make or break your DIY solar project, so it's essential to understand the key elements that drive efficiency.
Incorporating alternative energy sources, like wood pellet fireplaces, can enhance your overall energy strategy. To get started, focus on these fundamental components:
- Solar Panels: Choose high-quality panels, like those from Renogy, that fit your budget and power needs.
- Battery Capacity: Make sure you select batteries with enough capacity to support your appliances, especially if you're using them continuously. For colder climates, consider AGM batteries for better performance.
- Charge Controller: This device regulates the flow of energy from your panels to your batteries, preventing overcharging and prolonging battery life. Look for a controller that matches your system's voltage.
- Refrigerator Compatibility: When selecting a refrigerator, check whether it's designed for 12V or 120V systems. This guarantees it aligns with your solar setup, optimizing your energy use and efficiency.
Power Requirement Assessment
Understanding your power requirements is vital for a successful DIY solar project. Start by calculating the total wattage needed for all devices you plan to run. This step guarantees your system can handle continuous loads, like refrigerators, which typically draw significant power.
Make sure to choose components based on compatibility with your appliances; for instance, selecting 12V systems for your 12V refrigerator works well to maximize efficiency and performance. Additionally, take into account any potential impact on your health from environmental factors while working outdoors, such as cold medications overview if you're exposed to chilly conditions.
Don't forget to evaluate future power needs. If you think you might add devices, like a gaming setup, assess their wattage to avoid underestimating your system's capacity. Choosing the right batteries is important, too. In colder climates, opting for AGM batteries is wise, as they're better suited for extreme temperature fluctuations compared to lithium batteries.
For additional guidance, use resources like the DIY Solar Forum and YouTube channels. These platforms offer insights into effective component selection based on real user experiences and recommendations, helping you make informed decisions.

Ferrule Crimping Tool Kit, LUNEY Crimper Plier with 1250PCS Wire Ferrules Kit Wire End Terminals, Self-adjustable Ratchet Tool Set for AWG 23-7 Cable connectors, 0.25-10mm²
Wire End Terminals: Our brass plated wire end terminals are made of pure red copper and have good…
As an affiliate, we earn on qualifying purchases.
As an affiliate, we earn on qualifying purchases.
Installation and Maintenance Tips

A successful DIY solar installation hinges on proper wiring techniques and regular maintenance. To guarantee your solar system runs efficiently and reliably, follow these essential tips: Incorporating energy-efficient solutions, such as those found in top-rated heat pumps, can also enhance the performance of your home's energy system. For example, implementing smart solar power management techniques, such as using battery storage systems to store excess energy for use during low sunlight hours, can help maximize the benefits of your DIY solar installation. It’s also vital to regularly inspect and clean your solar panels to ensure they are functioning at their optimal level. Additionally, staying informed about the latest developments in solar technology can help you make informed decisions about upgrades and improvements to your system.
- Use High-Gauge Wires: Invest in high-gauge wires for maximum efficiency. They reduce energy loss and help maintain performance.
- Check Connections Regularly: Make it a habit to tighten screws and inspect connections every few months. This preventive maintenance can save you from costly repairs down the line.
- Familiarize Yourself with Components: Understand the installation requirements for solar panels, batteries, and inverters. This knowledge streamlines your setup and enhances safety.
- Document Your Installation: Keep detailed records of your installation process. This documentation will make troubleshooting and maintenance much easier in the future.
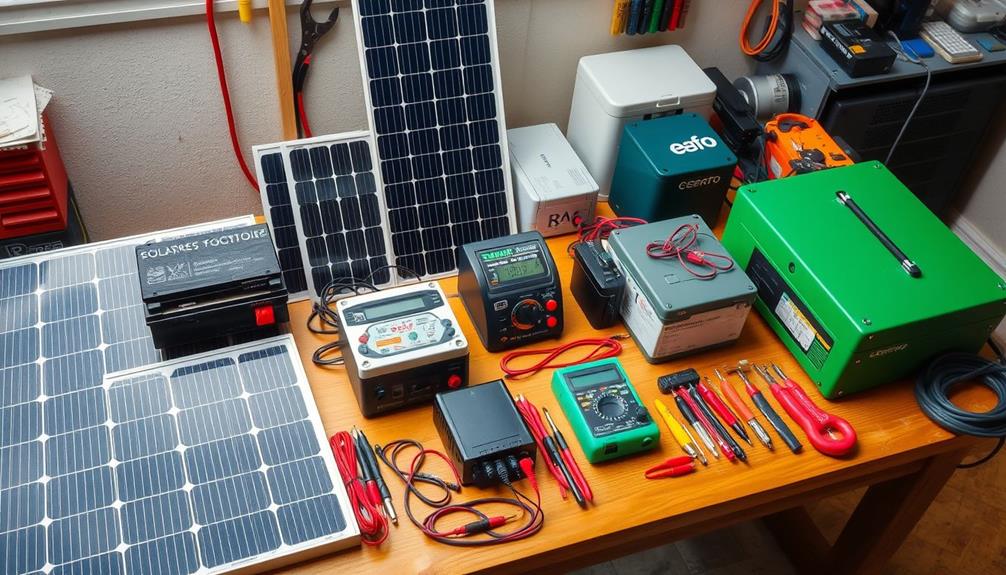
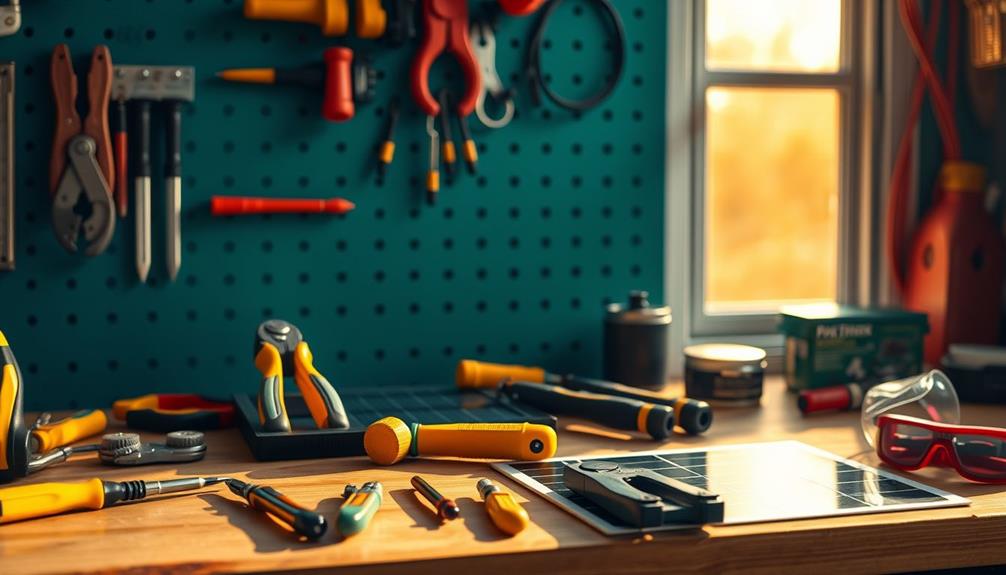
Importance of Quality Tools

Investing in quality tools is vital for the success and longevity of your DIY solar project. High-quality tools, like cable cutters and strippers, guarantee true cold welds and gas-tight joints, which are essential for the reliability of your solar installations.
When you choose reliable tools, you minimize the need for future replacements and reduce the risk of job failures that can lead to increased costs and delays. This attention to detail reflects the importance of quality assurance in making sure your installations meet high standards.
Using specialized tools, such as ratcheting crimpers and hydraulic crimpers, assures consistent performance, especially for larger gauge wires in solar setups.
Must-Have Cutting and Stripping Tools

When tackling your DIY solar project, having the right cutting and stripping tools can make all the difference. Investing in high-quality tools guarantees you get reliable performance, especially for vital wiring tasks.
Here are four must-have tools to elevate your project:
- High-Quality Cable Cutters: These are essential for effectively cutting both small and large wires, handling up to 0 gauge for clean, precise cuts.
- Specialized Wire Strippers: Models like the Joe Carr II are fundamental for stripping insulation from wires under 10 gauge. With adjustable blade depth, you can achieve perfect strips without damaging the conductor.
- Ratcheting Crimpers: Ideal for standard connectors, these tools provide consistent and reliable crimps that you can trust in your solar setup.
- Hydraulic Crimpers: For larger gauge wires, these high-quality crimpers guarantee a strong connection when maintained properly.
Soldering and Measurement Tools

Soldering and measurement tools play a critical role in guaranteeing your DIY solar project's success. High-quality soldering tools, like the FX 600 soldering iron by JAKO, are crucial for achieving reliable connections. Using leaded solder and flux will enhance the quality of your solder joints and make application much easier. A good soldering setup means your connections will hold up over time, ensuring longevity in your project.
When it comes to measurement, investing in accurate measuring equipment is equally important. DC and AC clamp meters, with Klein being a preferred brand, are indispensable for reliably measuring current and obtaining voltage and resistance readings during installation. This guarantees that everything works as intended.
Additionally, consider using a 30-ohm resistor for pre-charging capacitors to prevent damage to sensitive components during setup.
And don't overlook the importance of a high-quality measuring tape with a self-locking feature; it greatly improves the convenience and accuracy of your measurements. By equipping yourself with the right soldering and measurement tools, you're setting the stage for a successful solar project that's built to last.
Versatile Hand Tools and Accessories
Having a well-stocked toolbox is essential for any DIY solar project. The right hand tools can make all the difference in efficiency and effectiveness. You'll want to guarantee versatility in your selection, allowing you to tackle various tasks with ease.
Here are four must-have items:
- Phillips Screwdrivers: Look for ones with strong grip heads to handle various components securely.
- Dremel Multi-Max MM40: This tool is perfect for cutting through different materials, making it invaluable for solar setups.
- Quality Drill Bits: Invest in titanium nitrate-coated drill bits for enhanced durability and performance during installation tasks.
- Nylon Body Panel Removers: These are great for safely handling delicate parts without causing damage.
Additionally, don't forget about safety! Adding insulation to your standard tools using heat shrink or electrical tape can enhance safety and improve their overall effectiveness.
Maintaining a well-rounded selection of hand tools and accessories guarantees you're prepared for the diverse challenges of DIY solar installations, leading to quality results in your projects.
Evaluating Tool Costs and Performance

Choosing the right tools for your DIY solar project goes beyond just having a versatile selection; it's about evaluating their costs and performance to confirm you're making a smart investment. Investing in high-quality tools may cost more upfront, but they minimize future replacements and issues, ultimately providing better long-term value. Plus, regular maintenance of tools, like tightening screws and lubrication, can extend their lifespan and maintain peak performance.
To help you make informed decisions, consider these price comparisons:
| Tool Type | Quality Rating | Average Price |
|---|---|---|
| Cable Strippers | High | $30 |
| Crimpers | Medium | $20 |
| Screwdrivers | High | $25 |
While accuracy may be less critical for solar systems, choosing reliable tools can enhance overall project success without incurring excessive costs. Budgeting for essential tools confirms you have what you need for effective DIY solar installations. By weighing quality against price, you can strike the right balance and set yourself up for success in your solar projects.
Frequently Asked Questions
What Tools Do I Need for a Solar Installer?
For solar installation, you'll need high-quality cable cutters, specialized wire strippers, ratcheting and hydraulic crimpers, a reliable soldering iron, and accurate measurement tools like clamp meters to guarantee proper connections and performance.
What Is Needed for DIY Solar System?
For a DIY solar system, you'll need solar panels, a charge controller, batteries, and an inverter. Assess your power needs, choose quality components, and guarantee proper installation for peak performance and longevity.
Are DIY Solar Kits Worth It?
DIY solar kits are worth it if you value convenience and simplicity. They offer essential components for beginners, and you can gradually upgrade based on your needs, making energy independence more attainable without overwhelming yourself.
Who Is Will Prowse?
Will Prowse's a leading voice in DIY solar, sharing valuable tutorials and insights on building cost-effective solar systems. His experience helps you navigate installations, ensuring you understand power requirements and component compatibility for successful projects.
Conclusion
In the world of DIY solar projects, having the right tools is like having a solid foundation for a house; without it, everything else can crumble. Imagine trying to build a sturdy solar panel with a dull saw—frustrating, right? By investing in quality tools, you're not just saving time; you're ensuring your project shines bright for years to come. So gather your gear and get ready to harness the sun's power—your future self will thank you!