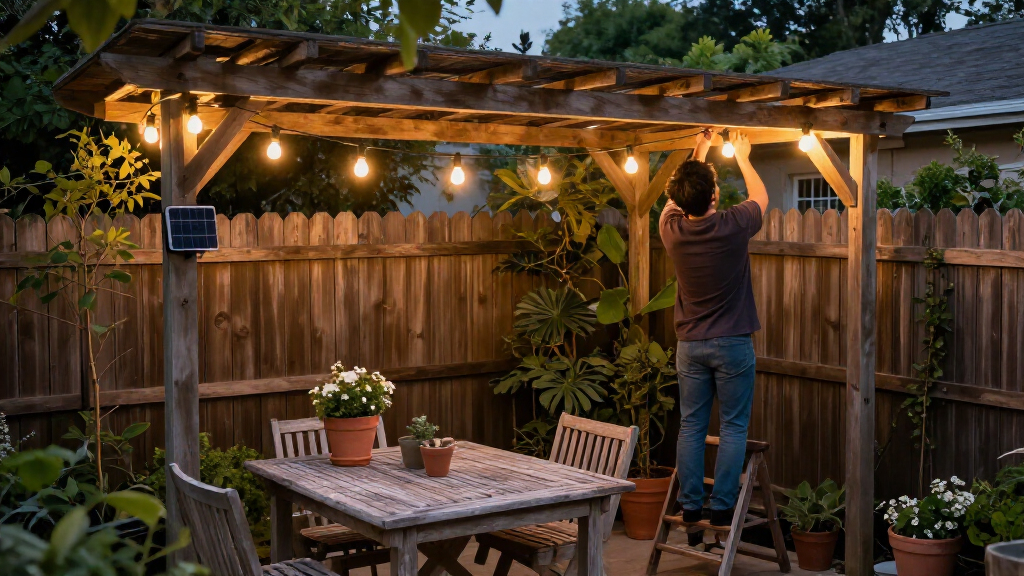

Install solar outdoor string lights by choosing a sunny panel location, planning a supported route, mounting the lights, and checking their operation after dark. This guide is for beginners setting up lights on a patio, balcony, fence, pergola, or garden. Allow about 1-2 hours for installation and a full sunny day for the first charge.

Get garden gear delivered free with Prime
- Fast, free delivery on millions of items
- Prime Video, Amazon Music and more included
- Member-only deals all year
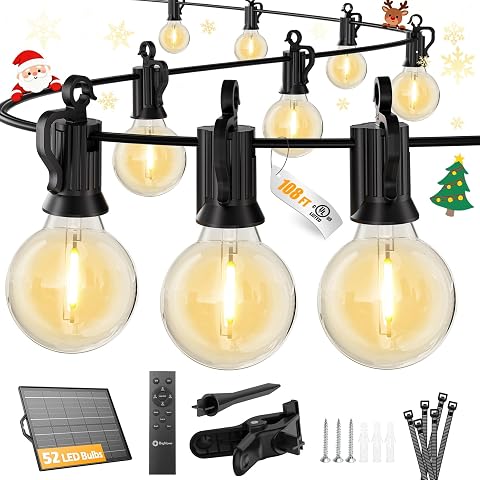
Brightown 108 ft Solar String Lights with Remote and USB Charging
- ✔ Length: 108 ft
- ✔ Bulbs: 50 shatterproof G40 bulbs; 2 replacements
- ✔ Bulb spacing: 2 ft

Brightown 52 ft Solar String Lights with Remote Control
- ✔ Length: 52 ft
- ✔ Bulbs: 15 LED bulbs plus 1 spare
- ✔ Bulb spacing: 3 ft

Electight 40 ft Solar Globe String Lights, 60 LEDs, Warm White
- ✔ Length: 40 ft, including 6.5 ft lead wire
- ✔ LEDs: 60 warm-white LEDs
- ✔ Globe diameter: 0.9 in
Difficulty: Beginner | Time: 1-2 hours, plus a full day of charging
What You’ll Need
Tools & Materials:
- Solar string light set with panel, mounting bracket, and manufacturer instructions
- Tape measure
- Pencil or removable marking tape
- Outdoor-rated hooks, clips, or cable ties suited to the mounting surface
- Screwdriver or drill and suitable bits, if the mounts require them
- Ladder, if needed
Knowledge:
- Basic measuring and safe use of a screwdriver or drill
- Ability to identify a stable mounting surface and a sunny location
Check the package for the light string length, panel cable length, included fasteners, and weather rating. Choose mounting hardware for the actual surface, such as wood, masonry, or a railing. Do not assume adhesive hooks will hold outdoors or support a long string.
Brightown 108 ft Solar String Lights with Remote and USB Charging
For buyers who want one string to span a broad patio, pergola, or fence line, 108 feet of coverage gives this Brightown set the strongest starting point in our comparison. Its 50 shatterproof G40 bulbs are spaced two feet apart, creating a more open arrangement than the 52-foot Brightown’s three-foot spacing. The 180-degree adjustable panel helps position the collector toward available sunlight, while USB-C backup charging gives us another way to recharge when the weather does not cooperate.The remote adds useful control over brightness, three lighting modes, and 6- or 8-hour timers. Compared with Electight’s eight modes, this set offers fewer effects, but its adjustable brightness and USB-C option are more consequential for buyers who expect to use the lights regularly. IP65 water resistance, two replacement bulbs, cable ties, and a mounting clip round out a practical package. The main limits are that the string cannot be connected to additional sets, and the panel must be covered to operate the lights during daylight. Check the full route before buying: its length is generous, but it does not solve the need for more coverage beyond one string.
Pros:
- 108-foot string gives the most stated coverage here.
- USB-C backup charging complements solar power.
- Remote controls four brightness levels, modes, and timers.
- Shatterproof bulbs, spare bulbs, and IP65 water resistance.
Cons:
- Cannot connect to additional sets.
- Solar panel must be covered for daytime operation.
Best for: Buyers lighting a long patio, pergola, or fence who value remote controls and a charging backup.
Not ideal for: Anyone who needs to link multiple strings or wants a set that can operate in daylight without covering its solar panel.
Bottom line: The strongest all-around choice when broad coverage and flexible charging matter more than expandability.
“The strongest all-around choice when broad coverage and flexible charging matter more than expandability.”
Brightown 52 ft Solar String Lights with Remote Control
At 52 feet with 15 bulbs, this Brightown is easier to fit around a modest seating area than the 108-foot version. Its bulbs sit three feet apart, so the light points are more widely spaced than on its longer sibling; that can suit buyers who prefer a less crowded look along a railing or pergola edge. Each bulb has a hook, which makes placement more adaptable and can reduce the need to improvise mounting points.It keeps several controls from the larger Brightown: four brightness levels, three modes, and timer settings through a remote. Automatic dusk-to-dawn operation is a helpful distinction, while solar and USB charging preserve flexibility. Its stated runtime reaches 30-plus hours, though performance depends on recharging, and the description warns that low battery can dim the lights. Compared with the 40-foot Electight, this set has fewer bulbs but more stated length and USB charging; compared with the 108-foot model, it gives up coverage and shatterproof-bulb details in exchange for a more compact run. It is best treated as a complete small-space solution, not a starting section for a larger linked display.
Pros:
- 52-foot length suits smaller outdoor areas.
- Hooks on each bulb offer flexible installation.
- Solar and USB charging with remote controls.
- Automatic dusk-to-dawn operation and IP65 rating.
Cons:
- Low battery may reduce brightness.
- Best charging depends on direct sunlight.
Best for: People decorating a small patio, balcony, or pergola edge who want hooks and automatic evening operation.
Not ideal for: Buyers who need dense bulb coverage across a large area or want runtime that is less dependent on direct sunlight.
Bottom line: A convenient, controllable pick for defined outdoor spaces where 52 feet is enough.
“A convenient, controllable pick for defined outdoor spaces where 52 feet is enough.”
Electight 40 ft Solar Globe String Lights, 60 LEDs, Warm White
Electight takes a different route: its 40-foot string carries 60 small warm-white globes, making it the densest listed light arrangement of these three by LED count. That makes it a natural fit for wrapping through a garden feature or outlining a compact seating nook where frequent points of light matter more than spanning a long roofline. Eight modes, including steady and slow fade, provide more variety than either Brightown remote offers.The tradeoff is charging flexibility. Unlike both Brightown options, this model is solar powered only, and its 13-hour minimum operating claim depends on adequate daytime charging. The panel needs four to six hours of direct sun according to the supplied details, so shaded yards or reliably cloudy locations may make its use less predictable. IP65 protection, stated cold resistance to -20°C, and included ground stakes support outdoor placement. Compared with the 52-foot Brightown, Electight is shorter and lacks USB backup, but it supplies many more LEDs and modes. Choose it for decorative density and effects, not for maximum reach or charging versatility.
Pros:
- 60 warm-white LEDs on a 40-foot string.
- Eight lighting modes, including steady and slow fade.
- IP65 rating and stated cold resistance to -20°C.
- Flexible string and ground stakes support varied placement.
Cons:
- Solar-only charging offers no USB fallback.
- Listed operating time depends on adequate direct sunlight.
Best for: Buyers who want a compact, decorative globe-light effect with multiple modes and a sun-exposed panel location.
Not ideal for: Anyone with a shaded installation spot, a need for USB charging, or a large area requiring long-span coverage.
Bottom line: A decorative compact option for sunny locations where LED density and mode variety outweigh charging backup.
“A decorative compact option for sunny locations where LED density and mode variety outweigh charging backup.”
As an Amazon Associate we earn from qualifying purchases.
Before You Start
Read the product instructions before mounting anything. Some sets have a removable battery tab, a power switch, or separate modes that must be set before use. Keep the panel where it can receive direct sunlight and where its cable can reach the lights without being stretched. Do not mount lights over a pool, walkway, or other area where a falling strand could create a hazard. If using a ladder, set it on firm, level ground and have another person steady it.
Step-by-Step Instructions
Step 1: Choose the light route
Measure the area you want to illuminate, then compare that distance with the usable length of the string. Mark the planned start, end, and any turns with removable tape or pencil marks. Leave a little slack at corners and near the panel connection so the wire does not pull against a fitting.
Plan attachment points along the route. Use closer spacing where wind may make the string sway, and include support near the ends. The light cable should hang neatly without carrying the weight of a long unsupported span.
Tip: Keep the route clear of sharp edges, hot surfaces, moving doors, and places where people may snag the cable.
Check: The route fits the string length, and you can point to stable locations for the end supports and intermediate clips.
Step 2: Select a sunny panel location
Place the solar panel where it will receive several hours of direct daylight, away from shade cast by roofs, trees, walls, or furniture. Check the spot at the time of day when the sun is strongest; a location that looks bright in the morning may be shaded later.
Confirm that the panel cable reaches the planned light route without stretching. If the panel can be angled, orient it toward the sun as the manufacturer recommends. Keep it accessible for cleaning and seasonal adjustment.
Tip: A shaded panel may still charge, but the lights may run for fewer hours or appear dimmer at night.
Check: The panel receives direct sun for a substantial part of the day and can connect to the string without a taut cable.
Step 3: Check and prepare the light set
Unpack the set and check the string, panel, connectors, and mounting parts for visible damage. Lay out the cable loosely on the ground and untangle it without pulling on the bulbs or sockets. Remove any battery isolation tab, switch the unit on, and select the desired mode if the instructions call for it.
Test the set in a shaded area or cover the panel to simulate darkness, following the product directions. Many solar lights turn off in daylight while the panel is charging, so a daytime test may require shading the panel.
Tip: Do not connect or use a set with cracked insulation, exposed wire, or a damaged panel connector.
Check: The cable and fittings look intact, and you have confirmed how the switch and dusk sensor work.
Step 4: Install the panel mount
Hold the panel bracket at the selected location and mark its screw holes. Check for hidden wiring or plumbing before drilling. Use fasteners made for the surface, then tighten the bracket so it does not wobble. Attach the panel and adjust its angle if the model allows it.
If the panel is ground-mounted, push its stake into firm soil where it will not be kicked, mowed over, or covered by plants. Do not force a stake into hard ground; loosen the soil first or choose another mounting method approved by the maker.
Tip: Keep the panel connector and cable entry facing as directed so rain can drain away rather than collect around the connection.
Check: The panel stays in place when gently touched, points toward open sky, and its cable hangs without strain.
Step 5: Attach the string supports
Install hooks, clips, or ties at the marked points, beginning with the end supports. Use fasteners that match the surface and are rated for outdoor conditions. If drilling into masonry, use an appropriate masonry bit and anchors. Avoid placing a fastener where it can pierce or crush the light cable.
For a long span, add a separate support wire or line rated for outdoor use if the product instructions allow it. Attach the light string to that support with loose clips rather than letting the electrical cable bear all the tension.
Tip: Do not use nails or staples over the cable; they can damage insulation and create an electrical hazard.
Check: All supports are secure, spaced along the route, and positioned so the cable can rest in them without being pinched.
Step 6: Hang and connect the lights
Start at one end and place the string into each support, working toward the other end. Keep the cable gently relaxed, and form smooth curves rather than sharp bends. If the set has removable bulbs, handle them by their bases and install them only as the instructions describe.
Connect the panel to the light string using the supplied connector. Align any keyed fittings and tighten or cap them as directed; do not force a connector that does not fit. Route excess cable neatly and keep connectors off the ground where water can pool.
Tip: Leave a small drip loop in a cable run where appropriate, so water runs away from a connector instead of toward it.
Check: The string follows the planned route, connectors are fully seated, and no section is stretched, trapped, or resting in standing water.
Step 7: Charge and check the lights after dark
Set the switch to the operating position and allow the panel to charge through a sunny day. At dusk, check whether the lights turn on automatically. If they do not, cover the panel briefly or use the product’s test procedure to check the sensor and mode setting.
Observe the lights from the area they are meant to serve. Adjust the spacing or sag only after switching the set off if the instructions call for that. If the lights are dim, let the panel receive a full sunny day before deciding that the set is faulty.
Tip: Cloudy weather, winter sun, shade, and a dirty panel can all reduce brightness or operating time.
Check: The string illuminates at dusk, stays supported, and provides the intended light without a loose connection or unsafe obstruction.
Common Mistakes to Avoid
- Mounting the panel where it is shaded for much of the day. — Check the location across the day and choose the sunniest reachable spot, even if the string route begins elsewhere.
- Stretching the light cable tightly between distant attachment points. — Add supports, leave gentle slack, and use a separate support line for long spans when the product allows it.
- Using indoor hooks, staples, or fasteners that can damage the cable. — Choose outdoor-rated mounts for the surface and keep all fasteners away from the wire itself.
Troubleshooting
Problem: The lights do not turn on at night.
Solution: Check that the switch is on, the battery tab is removed, and the panel connector is seated. Confirm the panel is not exposed to a nearby porch lamp that may fool its dusk sensor. Charge for a full sunny day, then test again using the maker’s procedure.
Problem: The lights turn on but are dim or switch off early.
Solution: Clean the panel with a soft, damp cloth and move it out of shade. Let it charge on a sunny day, then check the result after dark. Cold temperatures and short winter days can reduce runtime.
Problem: The string sags or moves excessively in wind.
Solution: Add supports between the existing mounts and reduce the unsupported span. Check that the fasteners suit the mounting surface and tighten or replace any loose ones.
Problem: The panel or a connector has water around it.
Solution: Switch the set off if safe, dry the area, and inspect the connector and cable for damage. Reposition the connection to avoid pooling water and follow the product instructions for weather exposure. Stop using the set if insulation is damaged.
What Success Looks Like
The panel is firmly mounted in a sunny position, the cable reaches without tension, and the lights are supported along the planned route. After a sunny charging day, the string turns on at dusk and remains illuminated for a useful period. The setup has no damaged insulation, loose connections, unstable mounts, or cables crossing a walking path.
Next Steps
Wipe dust and debris from the panel periodically and inspect mounts and cables after strong wind or heavy rain. Trim plants that begin shading the panel, and adjust its angle as the seasons change if the mount permits it. Store removable lights indoors during severe weather only if the manufacturer recommends removal. Replace rechargeable batteries with the specified type when runtime declines despite good sun exposure.
Frequently Asked Questions
How much sun do solar outdoor string lights need?
Many sets work best after several hours of direct sunlight, but charging needs vary by model, season, and battery condition. Check the product instructions and place the panel in the brightest suitable location.
Can I leave solar string lights outside in rain?
Only if the lights and panel are rated for the weather they will face. Check the product rating and instructions, and keep connectors positioned so water does not pool around them.
Why do the lights switch off before morning?
The panel may not have collected enough energy because of shade, cloud, short daylight, or a dirty surface. Clean and reposition the panel, then compare runtime after a sunny day.
Can I cut or extend the light string?
Do not cut or extend it unless the manufacturer specifically provides an approved method. Altering the cable can damage the set, affect weather resistance, or prevent the lights from working.