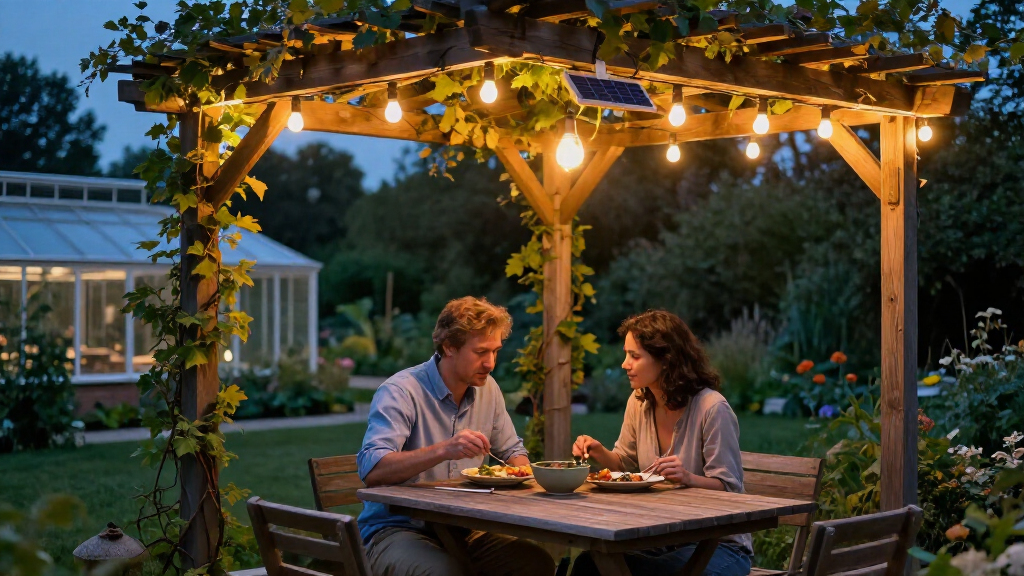

Install solar outdoor string lights by choosing a sunny location for the panel, planning the hanging route, securing suitable supports, and testing the lights after charging. This guide is for beginners setting up lights on a patio, balcony, garden, or other outdoor area. Allow about 1–2 hours for planning and installation, then give the panel a full sunny day to charge before judging nighttime performance.

Get garden gear delivered free with Prime
- Fast, free delivery on millions of items
- Prime Video, Amazon Music and more included
- Member-only deals all year
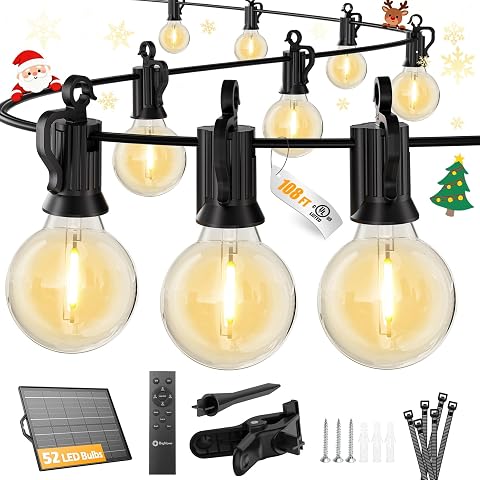
Brightown 108 ft Solar String Lights with Remote and USB Charging
- ✔ Length: 108 ft
- ✔ Bulbs: 50 shatterproof G40 LEDs plus 2 replacements
- ✔ Bulb spacing: 2 ft
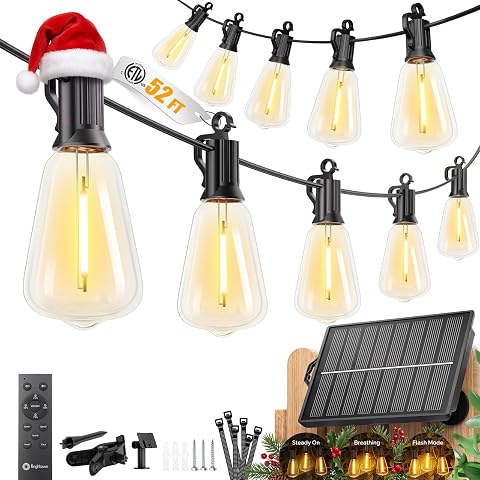
Brightown 52 ft Solar String Lights with Remote Control
- ✔ Total length: 52 ft
- ✔ Bulbs: 15 LED bulbs plus 1 spare
- ✔ Bulb base: E12

EEW Solar Christmas String Lights, 2-Pack, 200 Warm White LEDs
- ✔ Pack size: 2 strings
- ✔ LED count: 200 total; 100 per string
- ✔ String length: 33 ft each; 66 ft total
Difficulty: Beginner | Time: 1–2 hours, plus a full sunny day for charging
What You’ll Need
Tools & Materials:
- Solar string light set with panel, mounting stake or bracket, and included hardware
- Tape measure
- Pencil or removable marking tape
- Outdoor-rated hooks, screw eyes, or cable clips suited to the mounting surface
- Screwdriver or drill and compatible bits, if needed
- Ladder rated for your height and surface, if needed
- Optional: outdoor-rated guide wire, turnbuckles, and ties for longer spans
Knowledge:
- Basic measuring and hand-tool use
- How to use a ladder safely or access to a helper who can do so
Check the light set’s instructions for its charging method, weather rating, maximum span, and mounting hardware. Use only outdoor-rated lights and fittings in exposed locations. Plan for a nearby safe ladder position; do not install near overhead power lines or where people could snag the cable.
Brightown 108 ft Solar String Lights with Remote and USB Charging
For buyers who want one strand to define a larger patio or stretch along a fence, the 108 ft length and 50 shatterproof G40 bulbs make this the broadest-coverage pick in our lineup. Two-foot spacing creates a denser run than the 52 ft Brightown model’s three-foot bulb spacing, so the lights can feel more continuous across a seating area. The included ties and mounting clip also help with installation planning.Its main advantage over the EEW set is charging flexibility: solar is supplemented by USB-C, and the remote provides four brightness settings, three modes, and two timer choices. The stated continuous illumination is 36+ hours, longer than either alternative’s stated runtime. Those strengths come with a practical limit: this is one non-connectable strand, so it cannot be extended by linking another set. It also needs a sunny panel location for solar charging, and daytime operation requires covering the panel’s light sensor. This is our strongest all-around pick when coverage and convenient controls matter more than modular expansion.
Pros:
- 108 ft run with 50 shatterproof bulbs and two replacements
- Solar and USB-C charging options
- Remote offers four brightness levels, three modes, and two timer settings
- Includes cable ties and a solar panel mounting clip
Cons:
- Strands cannot be connected to extend coverage
- Solar charging depends on panel exposure; daytime use requires covering the light sensor
- A long single strand may be harder to route neatly across divided areas
Best for: People lighting a long patio, fence, or outdoor dining area who want remote adjustments and USB-C as a charging fallback.
Not ideal for: Buyers who need multiple connectable strands, separate short runs, or a set that can reliably operate in daytime without managing the panel sensor.
Bottom line: We recommend this as the most versatile choice for a large outdoor space, provided one long, non-connectable strand fits the layout.
“We recommend this as the most versatile choice for a large outdoor space, provided one long, non-connectable strand fits the layout.”
Brightown 52 ft Solar String Lights with Remote Control
When 108 ft would be excessive, this 52 ft Brightown offers the same useful solar-and-USB approach in a shorter run. Fifteen bulbs plus a spare and three-foot spacing suit a small patio, balcony, or a single pergola edge where a less dense arrangement is welcome. Compared with the 108 ft set, it asks for less routing and has hooks on each bulb for flexible mounting, though it cannot match that model’s wider coverage or denser two-foot spacing.The remote keeps the everyday controls convenient: we can choose among four brightness levels, three lighting modes, and a 6- or 8-hour timer. A stated runtime of up to 30+ hours is useful on paper, but actual brightness and runtime may decrease as the battery runs low. USB charging is the distinguishing fallback over EEW’s solar-only design when the panel cannot collect enough sunlight. The shorter length and fewer bulbs make this a more focused option rather than a substitute for broad coverage. Pick it when the space is modest and control flexibility matters; skip it if one strand must span a long fence or large entertaining area.
Pros:
- Solar and USB charging provide a fallback when sunlight is limited
- Remote adjusts brightness, modes, and timer
- Hooks on each bulb support flexible mounting
- IP65-rated for outdoor exposure
Cons:
- Fifteen bulbs and 52 ft of length provide less coverage than the 108 ft set
- Brightness and runtime may drop when the battery is low
- Solar charging performance depends on sunlight exposure
Best for: People who need a manageable strand for a balcony, small patio, or pergola and value a remote plus USB charging.
Not ideal for: Buyers covering a large outdoor area or seeking the denser, longer run offered by the 108 ft Brightown set.
Bottom line: We see this as the better fit for a smaller space where dual charging and remote control matter more than maximum coverage.
“We see this as the better fit for a smaller space where dual charging and remote control matter more than maximum coverage.”
EEW Solar Christmas String Lights, 2-Pack, 200 Warm White LEDs
EEW takes a different approach from the Brightown sets: instead of one bulb strand with USB backup and remote control, we get two separate 33 ft strings with 100 warm white LEDs apiece. That split makes it easier to decorate two small areas, wrap greenery, or store and reuse the strings seasonally. The 3000 K light and eight modes give the set a decorative character that differs from Brightown’s remote-controlled bulb strands. A memory function also helps retain a preferred mode between uses.The tradeoff is charging and runtime. EEW is solar powered only, calls for 6–8 hours of direct sunlight, and lists up to 10 hours of illumination per charge. That is shorter than the stated runtimes for both Brightown models, and there is no USB fallback if a panel’s location is shaded. Button controls are simpler but less convenient to adjust from across a patio than Brightown’s remotes. We would choose EEW for flexible seasonal or year-round decorative placement, particularly when two separate strings are useful. For long evening gatherings or a large area that needs a single continuous run, Brightown’s longer stated runtimes and charging alternatives are more practical.
Pros:
- Two separate 33 ft strings can be placed in different areas
- Eight modes and a memory function
- Automatic dusk-to-dawn operation
- IP65-rated panels and wiring for indoor or outdoor decor
Cons:
- Solar-only charging requires 6–8 hours of direct sunlight
- Up to 10 hours of stated illumination is shorter than the Brightown options
- Button controls offer less remote convenience
Best for: Decorators who want two independently placeable warm-white LED strings for seasonal displays, greenery, or smaller outdoor features.
Not ideal for: People who need USB charging, remote control, long stated runtime, or one long bulb strand for a large patio.
Bottom line: We recommend EEW for split, decorative layouts where eight modes matter and sunlight-only charging is workable.
“We recommend EEW for split, decorative layouts where eight modes matter and sunlight-only charging is workable.”
As an Amazon Associate we earn from qualifying purchases.
Before You Start
Unpack the set and check that the panel, cable, bulbs, controller, and mounting parts are present and undamaged. Many sets have a protective tab, shipping film, or OFF switch that must be addressed before charging. Follow the maker’s directions for the first charge; some panels charge best when disconnected from the light string. Pick a route that keeps the cable clear of doors, walkways, grills, and standing water.
Look for the panel’s switch and mode controls before mounting it. Confirm that the panel can receive several hours of direct sunlight each day, and that you can reach it later for cleaning or seasonal adjustment.
Step-by-Step Instructions
Step 1: Choose a sunny panel location
Find a spot that receives direct sunlight for most of the day, away from tree shade, roof overhangs, and walls that cast long shadows. Check the area at the time of day when you expect the panel to charge. If the panel has a separate cable, choose a position that keeps the cable within reach of the light string without stretching or pinching it.
Tip: A bright area can still be shaded for several midday hours. Watch the actual sun path rather than relying on how open the spot looks.
Check: The panel’s proposed location has a clear view of the sky during the strongest daylight hours and can be reached for maintenance.
Step 2: Measure and mark the hanging route
Measure the distance between the intended mounting points and mark where each hook or support will go. Include the route around corners and allow a small, even amount of slack so the cable does not pull tight. Keep bulbs high enough to avoid head contact and away from places where furniture, doors, or branches could catch them.
Tip: For a long or exposed span, plan to support the string on an outdoor-rated guide wire. The wire carries the tension so the light cable and bulb sockets do not have to.
Check: You have a clear route with reachable attachment points and enough cable length to connect the panel without strain.
Step 3: Install the supports
Fit hooks, screw eyes, or clips at the marks using hardware suited to the surface. For wood, use an appropriate pilot hole if the instructions for the fastener call for one. For masonry or other hard surfaces, use the matching anchors and drill bit. Attach the panel bracket or stake where planned, following the product instructions.
Tip: Do not attach lights to gutters, loose branches, or other weak supports. Keep ladder feet level, and have another adult steady the ladder when practical.
Check: Each support feels secure under a gentle hand check, and the panel mount holds the panel without wobbling.
Step 4: Mount the panel and set its direction
Secure the solar panel to its bracket or insert its stake into firm ground. Aim the panel toward the strongest available sunlight; in the Northern Hemisphere, a generally south-facing direction often helps, while local shade and season matter more than a fixed compass direction. Adjust the tilt according to the maker’s guidance, then route the panel cable without tight bends.
Tip: Avoid placing the panel where sprinklers regularly soak it unless its rating and instructions allow that exposure.
Check: The panel is stable, faces an open sunny area, and its cable reaches the string without being stretched or trapped.
Step 5: Hang the light string
Attach the string at its designated hanging points, working from one end to the other. Let the cable follow the planned route with relaxed, even spacing. If using a guide wire, fasten the wire to the supports first, then secure the string to it with suitable outdoor ties or clips. Do not pull on bulbs or sockets to close a gap.
Tip: Keep connectors and the controller off the ground and out of puddles. Do not coil excess cable tightly around a hot fixture or leave it where it can be cut by a door.
Check: The string hangs evenly, sockets are not bearing the span’s tension, and the cable clears walking paths and moving doors.
Step 6: Connect and set the controls
Connect the panel to the string as directed, aligning any keyed plugs and tightening weather covers if provided. Remove protective films or battery tabs, switch the unit to ON, and select the desired steady or flashing mode. If the set has a test button or remote, use it according to its instructions.
Tip: Many solar lights only turn on in darkness. To test in daylight, cover the panel or use the product’s test control rather than assuming a daytime failure.
Check: The connectors are fully seated, the controls are set, and the string responds to the test method specified by the manufacturer.
Step 7: Charge and check after dark
Leave the panel in its sunny position for the initial charge period stated in the instructions, or for a full sunny day if no period is given. At night, check that the lights switch on automatically or activate with the chosen mode. Inspect the route from several angles and adjust any support that lets the string sag or bulbs point awkwardly.
Tip: The first evening may be shorter or dimmer if the panel had limited sun. Judge normal run time after a clear day of charging.
Check: The bulbs illuminate after dark, remain attached securely, and light the intended area without a cable hazard.
Common Mistakes to Avoid
- Mounting the panel where it gets only indirect light or afternoon shade. — Observe the proposed location through the middle of the day and move the panel to a sunnier position before fixing the route.
- Stretching the light cable tightly between supports. — Leave gentle slack and use a guide wire for long spans so tension does not damage sockets or cable.
- Leaving the switch off or a protective shipping tab in place. — Check the switch, battery compartment, and packaging before charging, following the maker’s setup sequence.
- Putting a connector or controller on the ground. — Keep electrical connections elevated and use the set only within its stated outdoor weather rating.
Troubleshooting
Problem: The lights do not turn on the first night.
Solution: Check that the switch is ON, the plug is fully seated, and any tab or film has been removed. Charge the panel through a sunny day, then test in darkness or use the maker’s daytime test procedure.
Problem: The lights are dim or turn off early.
Solution: Move the panel away from shade, clean dust from its surface with a soft damp cloth, and allow a full sunny day to recharge. Cold weather, short winter days, and cloudy conditions can reduce runtime.
Problem: Some bulbs do not light.
Solution: Turn the set off before checking for loose bulbs or connectors. Reseat only replaceable bulbs as the instructions specify; replace damaged parts with compatible components.
Problem: The string sags or pulls at the sockets.
Solution: Add or reposition supports, reduce the unsupported span, or install a guide wire. Do not tighten the cable by pulling on the bulbs.
What Success Looks Like
The panel is firmly mounted where it receives substantial direct sun, the string is supported without strain, and all connections sit clear of the ground. After a sunny charging day, the lights turn on after dark and illuminate the planned area. The cable does not cross a walkway or get pinched by doors, and the set remains secure when checked gently.
Next Steps
Wipe the panel periodically and check the hooks, ties, and cable after strong wind or storms. Reposition the panel if seasonal shade changes, and expect shorter run time during cloudy weather or winter. Before storing the set, switch it off, disconnect it as directed, and keep the panel and lights dry. Replace batteries or bulbs only with compatible parts listed by the manufacturer.
Frequently Asked Questions
How many hours of sun do solar string lights need?
Requirements vary by set, but several hours of direct sunlight give the panel a better charge. Follow the product instructions and avoid relying on bright shade, which may not provide enough energy for a full evening.
Can I leave solar string lights outside in the rain?
Only if the lights, panel, and connections are rated for the exposure at your location. Check the product’s weather rating and instructions, and keep plugs and controllers out of standing water.
Why do solar lights turn off during the day?
Many sets use the panel to detect daylight and keep the bulbs off while charging. To test them, cover the panel or use the product’s test function as described in its instructions.
Can I extend a solar string light set?
Do not connect extra strings unless the manufacturer explicitly supports the added length and load. An unsupported extension can reduce brightness or damage the controller.