Connect with us

Green Living

DIY Guide: Constructing Your Own Wind Turbine

Capture the power of wind and break free from fossil fuels with a step-by-step guide to building your own efficient and cost-effective wind turbine.

Published

on

building wind turbine yourself

I'm taking the DIY approach to renewable energy and building my own wind turbine to harness the power of wind and reduce my reliance on fossil fuels. I've learned that wind energy reduces our reliance on fossil fuels, promotes energy independence, creates jobs, and generates clean and renewable energy – all while being cost-effective. To get started, I need to design efficient turbine blades, build a sturdy tower, assemble the components, and plan for ongoing maintenance. With the right guidance, I can successfully construct my own wind turbine and start reaping the benefits – let's delve into the details and make it happen.

Key Takeaways

  • Design turbine blades with a curved, tapered shape and gradual twist distribution to maximize energy capture and reduce drag.
  • Build a sturdy turbine tower with a secure concrete foundation, anchored with guy wires for stability and wind exposure.
  • Assemble turbine components, including the generator, blades, yaw mechanism, control system, and electrical system, following manufacturer's instructions.
  • Perform routine maintenance tasks, such as monthly visual checks, lubrication, and bolt tightening, to ensure optimal performance and longevity.
  • Consider the benefits of wind energy, including reduced reliance on fossil fuels, energy independence, and cost-effectiveness, when constructing your own wind turbine.

Benefits of Wind Energy
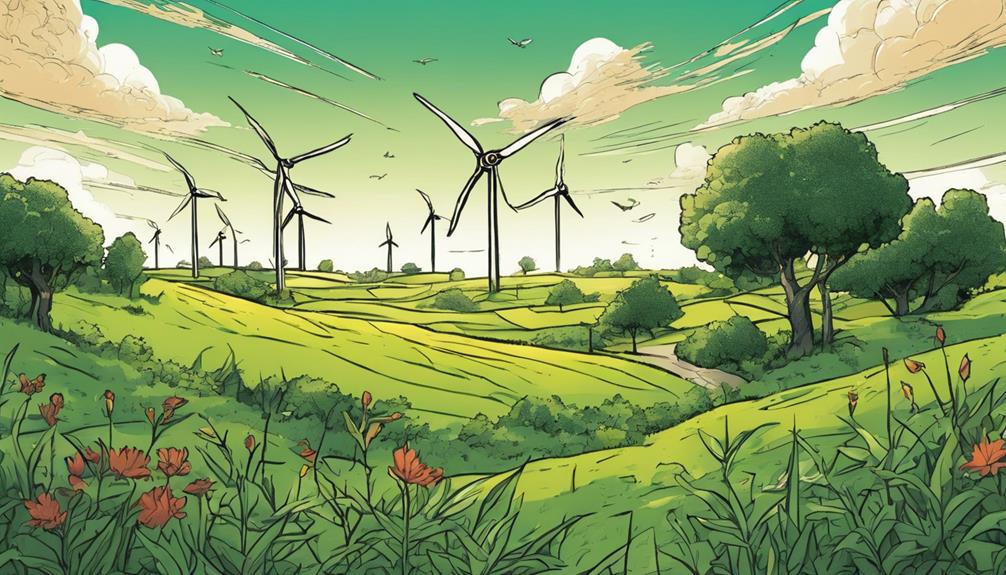
renewable clean sustainable power

As I explore the world of wind energy, I'm struck by the numerous benefits it offers, from reducing my reliance on fossil fuels to promoting energy independence and creating jobs in the process.

By harnessing the power of wind, I can generate clean and renewable energy, reducing my carbon footprint and contributing to a sustainable future.

Additionally, wind energy is cost-effective, making it an attractive option for homeowners and businesses alike. The job creation potential is also significant, with opportunities in manufacturing, installation, and maintenance.

Designing the Turbine Blades

innovative turbine blade design

As I progress with constructing my own wind turbine, designing the turbine blades is a vital step that demands careful attention to optimize energy conversion and turbine efficiency. The blade's shape, length, and material all play an essential role in harnessing wind energy. I must consider factors like twist distribution, airfoil cross-section, and tip shape to guarantee maximum energy conversion.

Blade FeatureOptimal DesignBenefits
ShapeCurved, taperedMaximizes energy capture
Length2-5 metersBalances efficiency and cost
MaterialFiberglass or carbon fiberLightweight, durable, and corrosion-resistant
Twist DistributionGradual, consistentReduces drag, increases efficiency
Tip ShapeRounded, aerodynamicMinimizes noise, vibration

Building the Turbine Tower

constructing a wind turbine

With the turbine blades designed, I now focus on constructing a sturdy tower to support the entire structure, guaranteeing it can withstand various weather conditions and maximize energy generation.

I choose a location with good wind exposure and ample space for the tower and base. Next, I prepare a secure foundation by pouring concrete into a dug hole for stability.

Then, I assemble the tower sections following the manufacturer's instructions and anchor it with guy wires. This secures the tower remains upright and stable, even in strong winds.

Advertisement

A well-built tower is essential for the turbine's performance and longevity, so I take my time to get it right.

Assembling the Turbine Components
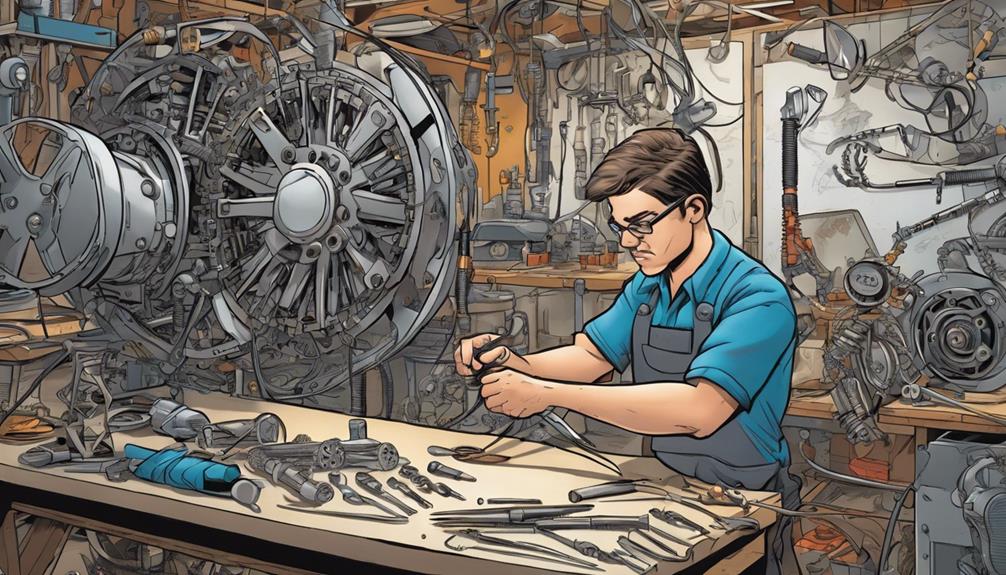
constructing wind turbine parts

I carefully attach the turbine's generator to the hub, ensuring a secure connection to convert the mechanical energy of the rotating blades into electrical energy.

Next, I connect the blades to the hub, making sure they're evenly spaced and properly aligned.

I then attach the yaw mechanism, which allows the turbine to rotate and face the changing wind direction.

After that, I install the control system, which regulates the turbine's speed and direction.

Finally, I connect the electrical system, ensuring the turbine is safely and efficiently generating power.

Advertisement

Throughout the assembly process, I follow the manufacturer's instructions and take necessary safety precautions to avoid any mistakes or accidents.

Ongoing Maintenance Tasks
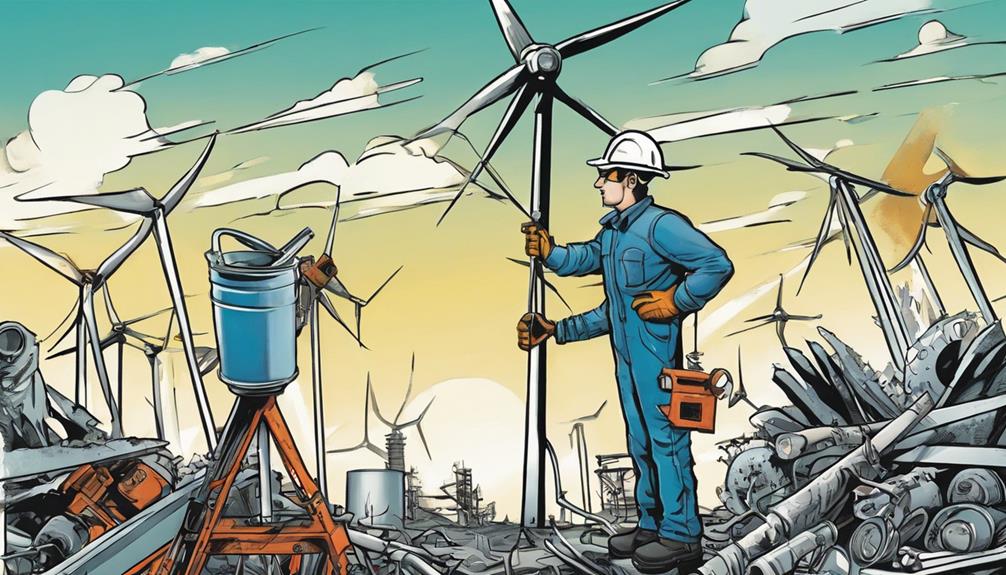
ongoing upkeep and tasks

Regular maintenance checks help uncover potential issues before they become major problems, guaranteeing the wind turbine operates efficiently and safely over its lifespan.

As the turbine's owner, it's my responsibility to perform routine inspections and tasks to prevent breakdowns. I schedule monthly visual checks of the blades and tower to identify any signs of wear or damage.

Every six months, I lubricate moving parts to keep them running smoothly. Annually, I tighten bolts to maintain the turbine's structural integrity.

Frequently Asked Questions

What Are the Safety Precautions When Working With Electrical Components?

'When working with electrical components, I always make sure I'm well-grounded, wear protective gear like gloves and goggles, and follow proper lockout/tagout procedures to prevent shocks and electrical fires.'

Can I Use Recycled Materials for Building My Wind Turbine?

"Building a wind turbine is like piecing together a puzzle, and using recycled materials is a clever move. Yes, I can repurpose old materials, like reclaimed wood or repurposed metal, to construct my turbine, reducing waste and costs."

Advertisement

How Do I Obtain Necessary Permits and Licenses for Installation?

Before installing my wind turbine, I need to obtain necessary permits and licenses from local authorities, ensuring compliance with zoning laws, environmental regulations, and electrical safety standards.

What Is the Ideal Distance Between Wind Turbines for Optimal Energy Generation?

"As I gaze out at the windswept landscape, I ponder the perfect spacing. Ideally, turbines should be placed 5-10 times their rotor diameter apart, allowing winds to recharge and maximizing energy harvest."

Can I Integrate My Wind Turbine With Existing Solar Panel Systems?

Yeah, I can definitely integrate my wind turbine with existing solar panel systems. By combining both, I'll maximize energy generation and reduce reliance on fossil fuels, making my home even more sustainable.

Does the Construction of a Wind Turbine Require a Significant Amount of Oil?

The construction of a wind turbine does not require a significant amount of oil. In fact, the oil consumption in wind turbines is minimal compared to the amount used in traditional energy production. Wind energy is considered a clean and sustainable alternative to fossil fuels, making it an environmentally friendly choice.

Conclusion

As I stand back to admire my handiwork, the gentle hum of my homemade wind turbine whispers sweet nothings of sustainability and self-sufficiency. It's a beacon of hope, a proof of the power of innovation and determination.

Advertisement

With every rotation, I'm reminded that the winds of change are in my hands – and now, they can be in yours too.

Advertisement

Green Living

Solar Outdoor Fan: Stay Cool While Saving Energy Outdoors!

Discover how a solar outdoor fan can keep you cool while reducing energy costs, and learn more about its amazing features and benefits!

Published

on

energy efficient outdoor cooling solution

A solar outdoor fan is your perfect companion for staying cool while saving energy outdoors. By harnessing solar power, it cuts down on your electricity costs and supports a sustainable lifestyle. With features like four speed settings and up to 20 hours of runtime, you can customize your comfort. The compact design and dual charging options—solar and USB—make it versatile for off-grid living. Just position it in a shaded area for ideal cooling. Using one not only enhances your outdoor experience but also contributes to a greener planet. You'll discover even more benefits and tips ahead!

Key Takeaways

  • Solar outdoor fans harness renewable energy, significantly reducing electricity bills and promoting off-grid living.
  • The ITEHIL fan features dual charging options (solar and USB) for versatile outdoor use.
  • With up to 20 hours of runtime, these fans provide consistent cooling while minimizing energy consumption.
  • Smart technology, including programmable timers, allows customized operation based on daily routines for optimal energy efficiency.
  • Utilizing solar-powered devices encourages sustainable living, lowering greenhouse gas emissions and promoting environmental stewardship.

Benefits of Solar Outdoor Fans

energy efficient outdoor cooling solutions

Solar outdoor fans offer a revitalizing solution for those hot summer days, harnessing the sun's energy to keep you cool while reducing your electricity bills. By utilizing a solar panel, these fans tap into renewable energy, cutting down your reliance on traditional power sources. This not only helps the environment but also gives you more freedom, especially if you enjoy off-grid living.

With advancements in technology, like AI-driven smart grids, the integration of renewable energy sources is becoming more efficient and reliable, further enhancing the benefits of solar products.

With a compact design and various charging options like USB and solar, you can enjoy the convenience of cooling wherever you go. Adjustable speed settings let you customize airflow to match your comfort level while maintaining energy efficiency. Whether you're hosting a backyard barbecue or relaxing at the beach, these fans guarantee you're never too hot.

Equipped with a long-lasting battery, solar outdoor fans can provide continuous cooling for up to 20 hours on low speed, making them perfect for outdoor activities. The integration of a solar panel means you can charge the fan during the day, so it's always ready when you need it most.

Embracing solar outdoor fans not only enhances your comfort but also promotes sustainable energy practices. Investing in a solar vent fan for your outdoor space can significantly reduce your reliance on traditional grid electricity, ultimately reducing your carbon footprint. These fans harness the power of the sun to operate, making them a cost-effective and environmentally friendly cooling solution. By embracing solar vent fans, you are taking a step towards a more sustainable and eco-friendly lifestyle while still enjoying a comfortable outdoor environment.

Advertisement

Key Features of ITEHIL Fan

itehil fan key features

When it comes to outdoor cooling solutions, the ITEHIL fan stands out with its impressive features designed for convenience and versatility. This solar fan's compact design enhances portability, making it perfect for any outdoor setting. You'll appreciate the dual charging methods, allowing you to charge the fan via USB in just 10 hours or harness solar energy in 14 hours, ensuring you're never left without cooling.

The fan offers four speed settings—low, medium, high, and turbo—giving you the flexibility to choose the perfect airflow for your needs. With a robust battery capacity of 10,000 milliamp, it can run up to 10 hours on turbo mode and an impressive 20 hours on low, so you can enjoy prolonged cooling wherever you go. Plus, the USB-A port lets you charge other devices while you relax outdoors.

Here's a quick overview of the ITEHIL fan's key features:

Feature Description
Power Source Solar & USB charging
Speed Settings 4 (low, medium, high, turbo)
Battery Capacity 10,000 milliamp
Run Time Up to 10 hours (turbo)
USB Port Yes, for charging devices

Energy Efficiency and Savings

sustainable energy cost reduction

Experience energy efficiency like never before with the ITEHIL solar fan, which cleverly combines solar and USB charging to reduce your reliance on traditional power sources.

This compact fan operates on renewable solar energy, promoting significant energy savings while providing outdoor cooling. With features similar to those found in the best heat pumps, this fan guarantees peak comfort during various weather conditions.

With a robust battery capacity of 10,000 milliamp, you can enjoy up to 20 hours of cooling on low speed. This means you can keep cool without constantly worrying about energy costs.

You'll appreciate the four speed settings that allow you to customize airflow according to your needs. By using lower speeds during milder temperatures, you can enhance energy efficiency even further.

Advertisement

The ITEHIL solar fan also mimics natural wind patterns, delivering comfort without the high energy expenses linked to conventional air conditioning systems.

Installation Tips for Optimal Use

optimal installation use tips

To get the most out of your ITEHIL solar fan, proper installation is key. Start by placing the fan on the shaded sides of structures to maximize cooling effectiveness. This positioning minimizes heat absorption during hot days, allowing your solar fan to work more efficiently.

Additionally, using a well-designed fan can enhance airflow and energy efficiency, similar to the benefits of best outdoor ceiling fans in outdoor spaces. If you're looking for quieter operation, consider wiring two 80mm 12VDC fans in series. This setup maximizes power usage from the solar panels while keeping fan speeds slower and noise levels down.

In addition, utilize adjustable louvers in your installation to control airflow direction. This feature enhances circulation in the area where the fan is set up. Regularly check the cubic feet per minute (CFM) ratings of your fans to guarantee they meet the airflow needs of your space. Proper airflow is essential for peak cooling performance.

Lastly, make sure to securely install the fans to prevent movement or damage over time. A stable installation guarantees long-term performance and reliability, so you can enjoy the benefits of your solar outdoor fan for years to come.

Following these tips will help you achieve the best results while keeping your outdoor space cool and comfortable.

Advertisement

Enhancing Outdoor Comfort

improving outdoor living experience

With the heat of summer bearing down, enhancing outdoor comfort becomes essential for enjoying your outdoor space. One effective way to achieve this is by utilizing a solar outdoor fan, like the ITEHIL model. This fan operates on renewable energy, reducing your reliance on traditional electricity sources and cutting down on energy costs.

Additionally, incorporating elements like unique and wicked planters can further elevate your outdoor ambiance while providing a revitalizing green space.

The fan's compact design features a robust battery capacity of 10,000 milliamp, providing up to 20 hours of runtime on low speed. This makes it perfect for extended use during those hot summer days. With four speed settings, including a turbo option, you can easily adjust the airflow to suit various outdoor conditions and activities.

The integrated solar panel allows the fan to recharge while in use, promoting sustainability and ensuring you won't be tethered to electrical outlets. By simulating natural breezes, a solar outdoor fan helps mitigate the effects of high temperatures and humidity, considerably improving your outdoor comfort levels.

Maintenance Best Practices

effective equipment care guidelines

Maintaining your solar outdoor fan is essential to enjoying its benefits season after season. By following some simple maintenance practices, you can guarantee your fan runs efficiently and lasts longer.

Regular maintenance not only enhances performance but can also help you avoid costly repairs down the line, similar to how one should be mindful of cold medications overview for effective relief.

Here are some best practices to keep in mind:

Advertisement

  1. Clean the Vents and Blades: Regularly wipe down the fan's vents and blades to prevent dust and debris buildup. This keeps airflow ideal and enhances efficiency.
  2. Inspect Seals and Insulation: Check the fan's seals and insulation for wear or damage. Maintaining these components helps prevent heat infiltration and boosts energy efficiency.
  3. Schedule Mechanical Checks: Periodically inspect the fan's mechanical parts, such as the motor and battery. Confirming they're functioning correctly is vital for performance.
  4. Replace Worn Parts Promptly: Don't wait to replace any worn-out components. Timely replacements avoid decreased performance and help prolong the fan's lifespan.

Additionally, keep detailed records of your maintenance activities, including cleaning schedules and part replacements.

This way, you can track your fan's performance over time and guarantee it continues to serve you well!

Integrating With Off-Grid Living

sustainable off grid solutions integration

As you embrace off-grid living, integrating a solar outdoor fan can greatly enhance your comfort while promoting sustainable practices. The ITEHIL solar fan is designed specifically for this lifestyle, offering dual charging options: solar energy and USB. This flexibility makes it perfect for remote locations without traditional electricity sources.

With a compact design and a solid battery capacity of 10,000 milliamp, the fan can run for up to 20 hours on low settings, ensuring you stay cool without needing continuous power. Additionally, it features a natural wind simulation mode and four speed settings, allowing you to customize airflow according to your comfort needs.

Here's a quick comparison of the benefits of using a solar outdoor fan:

Feature Benefit
Dual Charging Options Solar and USB for versatile use
Long Battery Life Up to 20 hours on low settings
Adjustable Airflow Four speeds for personalized comfort

Comparing Cooling Techniques

evaluating cooling methodologies effectively

When it comes to cooling your outdoor space, you've got options.

Natural ventilation methods, like opening windows and using fans, can be effective, especially when combined with gentle stretching before bedtime to help you relax and enjoy your outdoor environment.

Mechanical cooling options, such as air conditioners, bring a different level of comfort.

Advertisement

Let's compare these techniques to see which one suits your needs best.

Natural Ventilation Methods

Natural ventilation methods offer an invigorating alternative to traditional cooling techniques, effectively harnessing natural airflow to lower indoor temperatures. By utilizing these strategies, you can create a more comfortable indoor environment while minimizing energy consumption.

Implementing a well-thought-out budget for home improvements can also enhance your energy efficiency and overall comfort, which is an essential aspect of a sound financial strategy.

Here are some effective natural ventilation techniques to evaluate:

  1. Cross-Ventilation: Use inlet and outlet fans to promote air exchange, enhancing airflow throughout your space.
  2. Stack Effect: Design your building to allow warm air to rise and escape through higher openings, while cooler air enters from lower ones.
  3. Roof and Side Vents: Incorporate vents into your building design to facilitate hot air escape and encourage cooler outside air to flow in.
  4. Thermal Mass Materials: Use materials that absorb heat during the day and release it at night, enhancing the cooling efficiency of natural ventilation.

Combining these methods with reflective materials can minimize heat absorption and create an even cooler environment.

Embracing natural ventilation not only leads to a more pleasant living space but also reduces your reliance on mechanical cooling systems, making it a sustainable choice for your home.

Advertisement

Mechanical Cooling Options

Often, homeowners seek effective cooling solutions that balance comfort and energy efficiency. Mechanical cooling options, like solar outdoor fans, offer a fantastic alternative to traditional air conditioning, as they can greatly contribute to high-quality content that enhances energy-saving strategies.

These fans harness solar power, drastically reducing your electricity costs while keeping you cool. Solar outdoor fans can run for impressive durations—up to 10 hours on turbo mode and 20 hours on low. This makes them perfect for off-grid living situations or outdoor activities.

With adjustable speed settings and natural wind simulation features, these fans enhance airflow, creating a comfortable environment in your outdoor spaces. When combined with shade structures and proper ventilation strategies, utilizing solar fans can greatly lower ambient temperatures.

Their compact design and dual charging capabilities—USB and solar—make them versatile tools for various outdoor scenarios, from camping trips to gardening. Incorporating solar fans into your cooling strategy not only helps you stay cool but also promotes energy efficiency.

Utilizing Smart Technology

embracing innovative tech solutions

When you choose the ITEHIL Solar Fan, you tap into smart charging options that harness renewable energy effectively.

This is akin to the strategic approach of diversifying retirement portfolios, such as with a Gold IRA, which can protect against inflation and market downturns.

Advertisement

Its energy-efficient operation and integrated timer functionality allow you to customize usage, ensuring you only run the fan when you need it.

This means you can enjoy a comfortable environment while maximizing battery life and minimizing energy waste.

Smart Charging Options

The ITEHIL Solar Fan's smart charging options make it an ideal companion for outdoor adventures. Not only does it provide a reliable cooling solution, but it also encourages sustainable practices with its energy-efficient design, similar to the principles of easy composting that promote recycling and resourcefulness.

You've got flexibility with dual charging capabilities—plug it in via USB for a quick 10-hour charge, or let it soak up the sun for about 14 hours. This versatility guarantees you're always ready to beat the heat, whether you're off-grid or near a power source.

Here are some standout features of the fan's smart charging options:

Advertisement

  1. Robust Battery: With a 10,000 milliamp-hours capacity, you can enjoy up to 10 hours on turbo mode or 20 hours on low.
  2. Timer Settings: Choose operation durations of 2, 4, 6, or 8 hours to optimize energy usage based on your needs.
  3. Natural Wind Simulation: Experience realistic airflow while consuming less energy compared to traditional cooling methods.
  4. USB-A Port: Charge your other devices, making the fan a versatile solution for any outdoor activity.

These smart charging options not only keep you cool but also help you harness renewable energy effectively.

Energy-Efficient Operation

Harnessing smart technology, the ITEHIL solar fan operates with remarkable energy efficiency, making it a standout choice for eco-conscious users. With its built-in solar panel, you can charge the fan outdoors and reduce your reliance on electricity. The fan features a powerful 10,000 milliamp battery, allowing it to run for up to 20 hours on low speed—perfect for extended outdoor use.

Here's a quick look at its energy-efficient operation:

Feature Description Benefits
Solar Charging Built-in solar panel for outdoor charging Minimizes electricity reliance
Battery Capacity 10,000 milliamp 20 hours of cooling on low speed
Speed Settings Four speeds, including turbo mode Maximizes airflow while conserving energy
Natural Wind Simulation Realistic airflow experience Enhances comfort with energy efficiency

Timer Functionality Benefits

By incorporating timer functionality, the ITEHIL Solar Fan allows you to tailor its operation to your specific needs, ensuring efficient energy use. With this feature, you can program the fan to run for 2, 4, 6, or 8 hours, enhancing its performance based on your daily routine.

Here are some key benefits of this smart technology:

  1. Energy Savings: The timer prevents unnecessary operation during cooler evening or morning hours, helping you save on energy.
  2. Peak Performance: Schedule the fan to operate during the hottest parts of the day, improving your comfort without wasting energy.
  3. Convenience: You won't need to constantly monitor the fan; it shuts off automatically based on your settings.
  4. Customization: Easily adjust the fan's operation to match your lifestyle and weather conditions, ensuring ideal airflow management.

With the ITEHIL Solar Fan's timer functionality, you gain control over your cooling needs while minimizing energy consumption.

This feature is especially significant for off-grid living, allowing you to enjoy comfort without compromising efficiency.

Advertisement

Embracing a Sustainable Lifestyle

adopting eco friendly practices

Embracing a sustainable lifestyle means making conscious choices that benefit both you and the planet. By opting for solar-powered devices, like solar outdoor fans, you harness renewable energy, reducing your reliance on traditional power sources. This choice not only lowers your energy costs but also helps maintain comfortable outdoor spaces while minimizing your carbon footprint.

Solar outdoor fans operate efficiently, utilizing clean energy to provide natural airflow without the need for conventional electricity. This aligns perfectly with energy conservation and environmental stewardship principles, promoting a healthier planet. By using solar technology, you contribute to decreasing greenhouse gas emissions associated with fossil fuel energy production.

Moreover, choosing solar outdoor fans allows you to enjoy cooling breezes without adding to air pollution, positively impacting local ecosystems. Investing in these sustainable outdoor solutions fosters a deeper connection with nature and supports a lifestyle that prioritizes reducing waste and promoting clean energy resources.

Incorporating solar outdoor fans into your outdoor living space isn't just a practical solution; it's a step toward a more sustainable future. Make the switch today and enjoy the benefits of a greener lifestyle while staying cool outdoors!

Frequently Asked Questions

What Are the Disadvantages of a Solar-Powered Fan?

You'll find solar-powered fans can struggle on cloudy days, have higher initial costs, and might not work well in shaded areas. Their lower power output and maintenance needs can also be drawbacks compared to traditional fans.

What Are the Benefits of Solar Powered Fans?

Solar-powered fans offer you energy savings, reduced utility bills, and eco-friendliness. They operate off-grid, have long battery life, adjustable speeds, and require minimal maintenance, making them a smart choice for sustainable cooling solutions.

Advertisement

Do Solar Attic Fans Help Cool Your House?

Yes, solar attic fans help cool your house. They effectively ventilate hot air, reducing indoor temperatures and minimizing your reliance on air conditioning, which can lower cooling costs by up to 30% during hot weather.

Are Solar-Powered Fans Any Good?

Solar-powered fans provide efficient cooling without electricity costs. With customizable speed settings and long battery life, you'll enjoy comfort outdoors while also benefiting from their eco-friendly design and ability to charge devices.

Conclusion

Incorporating a solar outdoor fan into your space not only keeps you cool but also helps you save energy, like having a personal breeze machine powered by the sun. By embracing this eco-friendly solution, you're stepping into a sustainable lifestyle that benefits both you and the environment. So, why not set up your outdoor haven today? With energy efficiency and comfort at your fingertips, you'll create a revitalizing retreat that's always in vogue, no matter the weather!

Continue Reading

Green Living

Wind Generator Kit: Build Your Own Power Source and Save Big!

Power your home sustainably with a DIY wind generator kit and discover how to maximize your savings and energy efficiency. What are the essential components?

Published

on

diy wind power kit

You can build your own wind generator kit to harness renewable energy and greatly cut your electricity costs. With a DIY project costing around $140, you'll save big compared to commercial options that can reach $1,000. Essential components like a generator, aerodynamic blades, and a sturdy mounting system make it possible to generate power from the wind. Plus, you'll enhance your home's value and reduce your carbon footprint. By assembling and optimizing your setup, you can enjoy long-term savings and sustainability. Stick around to discover the best practices for building and maintaining your wind generator!

Key Takeaways

  • Build your own wind generator kit for approximately $140, significantly less than commercial options costing $750-$1000.
  • Utilize essential components like a DC motor, PVC blades, a charge controller, and batteries for effective energy generation.
  • Follow a step-by-step assembly process to construct, test, and optimize your wind turbine for maximum efficiency.
  • Enjoy long-term savings on energy bills, with potential reductions of up to 80% for off-grid living.
  • Contribute to environmental sustainability by reducing reliance on fossil fuels and lowering your carbon footprint.

Project Motivation and Goals

inspire and achieve objectives

Building a wind generator kit is driven by the need for energy independence, especially in remote areas like Arizona, where electric service is non-existent. By creating your own DIY wind turbine, you can tap into the consistent winds of your Arizona property, greatly reducing energy costs.

Additionally, the use of advanced materials in turbine construction can enhance performance while keeping costs low, ensuring a more efficient energy capture. While commercial turbines can set you back between $750 and $1000, your project might only cost around $140, making it a smart choice for off-grid living.

Your goal is to harness renewable energy through wind energy generation, aligning perfectly with a broader commitment to alternative energy sources. By incorporating wind power alongside solar energy applications and biomass solutions, you can create a more sustainable power generation system.

Not only will this approach fulfill your immediate energy needs, but it also promotes environmental stewardship. By reducing reliance on fossil fuels, you're actively lowering your carbon footprint, contributing to a healthier planet.

In essence, your motivation for building a wind generator kit is about more than just cost savings; it's about empowering yourself with energy independence while supporting sustainable practices in your community.

Advertisement

Essential Components for Construction

key elements of building

To successfully harness wind energy, you've got to gather several key components for your DIY wind generator kit. The generator, often a permanent magnet DC motor, is fundamental because it converts wind energy into electrical energy. Consider using an Ametek motor, known for its efficiency and ability to generate several hundred watts of power.

As the demand for renewable energy solutions increases, understanding the ethical implications of technology in energy generation can enhance your project's impact, as highlighted by AI Ethicist Jobs.

Next, you'll need blades designed for ideal aerodynamics to capture the wind effectively. You can create these blades from PVC or ABS pipe, with a common design featuring four airfoil-shaped blades.

A sturdy mounting system is essential for stability and height, allowing your wind generator to harness wind effectively.

Don't forget the charge controller, which monitors battery voltage and prevents overcharging, keeping your energy storage safe and efficient, typically set between 11.9V and 14V.

Batteries play an important role in energy storage, ensuring you have power when the wind isn't blowing. Additionally, you'll need wiring for connectivity and safety features like blocking diodes to protect against backflow of electricity.

Advertisement

With these fundamental components, you're well on your way to building an effective DIY wind generator.

Step-by-Step Assembly Process

detailed assembly instructions provided

Once you've gathered all the essential components, you can plunge into the assembly process of your wind generator. Start by constructing the blades from PVC or ABS pipe, shaping them into airfoils to maximize wind capture. Aim for a diameter of around 6 inches and a length of 24 inches for peak performance.

Proper assembly and design are vital to guarantee your generator operates efficiently, much like selecting the best heat pump for your home can greatly improve energy efficiency and comfort ideal comfort in varying weather conditions.

Next, assemble the hub by securely attaching the blades to the generator, using drilling and bolting techniques for a solid connection. This step is essential for efficient power generation.

Now, it's time to focus on the mounting system. Use PVC and metal conduit to build a sturdy turbine mounting and tower base. This structure should allow for easy raising and lowering, making maintenance and seasonal adjustments straightforward.

Once the physical assembly is complete, integrate the electronics. Connect the charge controller to the battery system, verifying you set the voltage parameters correctly—around 11.9V for low and 14V for high operation.

Advertisement

Proper connections here will manage power flow and prevent overcharging, ensuring your wind generator operates smoothly. With everything assembled, you're on your way to harnessing wind energy effectively!

Testing and Optimization Techniques

effective testing optimization strategies

With your wind generator fully assembled, the next step involves testing and fine-tuning its performance. Start by conducting initial tests in varying wind conditions to verify your turbine achieves ideal rotational speed without load.

For testing purposes, you'll want to measure the voltage output using a multimeter. Aim for around 14.5 volts to effectively charge your batteries.

Additionally, think about incorporating primitive weapons for modern survival techniques for enhancing your self-reliance during unforeseen circumstances.

Here are three key techniques to reflect on:

  1. Use a Charge Controller: Implement a charge controller to manage power flow and prevent battery overcharging. Set your voltage thresholds at 11.9V for low operation and 14V for high operation.
  2. Monitor Wind Capture: Regularly adjust the turbine's angle and orientation to maximize wind capture while minimizing strain during high winds for safety and efficiency.
  3. Document Performance Data: Keep track of your performance data and make iterative adjustments to your blade design or tower height. This will enhance power generation based on your local wind patterns.

Cost Breakdown and Savings

expense analysis and optimization

Building a DIY wind generator kit can be a financially savvy choice, costing as little as $140.62 compared to the $750-$1000 typical for commercial turbines. By opting for a DIY wind solution, you not only save on initial expenses but also create a cost-effective renewable energy source.

Understanding the importance of budgeting for investments can help you allocate funds effectively for your project. The primary costs in your project will involve the motor/generator, pipe fittings, and some miscellaneous hardware.

Advertisement

To further reduce your costs, consider using scrap materials or surplus items you already have at home. This approach makes renewable energy accessible to even more people.

As you construct your own wind generator, you'll enjoy substantial savings on your energy bills, allowing you to invest in other areas of your life. The wind generator benefits extend beyond just the financial aspect. By generating your own clean energy, you’ll be reducing your carbon footprint and contributing to a more sustainable environment. Additionally, with the independence of your own energy production, you’ll be less affected by fluctuations in energy prices and potential power outages.

Moreover, the investment in a DIY wind turbine can lead to long-term financial benefits. Lower energy costs mean more money in your pocket over time, and your property value may also increase, as homes with renewable energy sources are often more desirable.

Long-Term Benefits of Wind Energy

sustainable advantages of wind energy

Investing in a DIY wind generator not only saves you money upfront but also sets the stage for impressive long-term benefits. By harnessing wind energy, you can achieve considerable long-term financial savings and energy independence.

Additionally, as more households explore sustainable energy solutions, the demand for thrilling adventures in renewable energy is on the rise. Here are three key advantages:

  1. Cost Efficiency: Wind energy can cut your electricity bills by up to 80%, especially for off-grid living. The operational costs of wind turbines are lower compared to traditional fossil fuels, making them a smart investment.
  2. Environmental Impact: As a renewable resource, wind energy helps reduce greenhouse gas emissions, considerably lowering your carbon footprint. This shift contributes to combating climate change and creating a healthier planet for future generations.
  3. Economic Growth: The increased use of wind energy can stimulate local economies by creating manufacturing jobs and opportunities in installation and maintenance.

With a lifespan of 20 years or more for wind turbines, you can enjoy prolonged energy generation, ensuring a solid return on your investment.

Frequently Asked Questions

How Much Power Can a Homemade Wind Turbine Generate?

A homemade wind turbine can generate between 100 to 1,000 watts, depending on its size, design, and wind speed. Placing it in a prime location guarantees you capture the most energy efficiently.

Advertisement

What Is the Biggest Downside of Generating Electricity Using Wind Turbines?

Generating electricity with wind turbines can feel like chasing the wind; it's unpredictable. The biggest downside is their reliability issues, often leading to mechanical failures and inconsistent power output, leaving you frustrated and underpowered.

How Much Electricity Does a Large Wind Generator Produce?

A large wind generator typically produces between 1.5 to 3 megawatts of electricity under ideal conditions. That's enough to power 300 to 900 homes, depending on local energy consumption and prevailing wind speeds.

What's the Best Way to Make a Wind Turbine Generate More Power?

You might think it's too complex, but optimizing your turbine's blade design and height can considerably boost power generation. Pair it with a high-voltage generator and a charge controller to enhance efficiency and storage.

Conclusion

By building your own wind generator kit, you're not just saving money; you're investing in a sustainable future. While conventional energy sources drain your wallet and deplete the earth, harnessing wind power allows you to generate clean energy right at home. With a little effort, you can turn the wind into your ally, reducing energy costs while contributing to a healthier planet. Embrace the power of wind, and watch both your savings and environmental impact soar!

Advertisement

Continue Reading

Green Living

Solar Cap Lights: The Stylish and Eco-Friendly Lighting Solution!

Unlock the secret to stylish, eco-friendly outdoor lighting with solar cap lights that save you money and enhance your space in unexpected ways.

Published

on

stylish eco friendly solar lighting

Solar cap lights are a stylish and eco-friendly way to illuminate your outdoor spaces. They harness solar energy, so you don't have to worry about electricity bills. With an automatic dusk-to-dawn feature, these lights offer hassle-free operation while providing up to 50 lumens of soft, welcoming light. Designed from durable, weather-resistant materials, they're built to last in various conditions. Plus, installation is easy with no wiring required. Whether you're enhancing your garden or patio, these lights add a touch of elegance and sustainability. Stick around, and you'll discover more benefits and tips on using solar cap lights effectively!

Key Takeaways

  • Solar cap lights provide 50 lumens of illumination and utilize renewable energy for eco-friendly outdoor lighting solutions.
  • They feature automatic dusk-to-dawn operation, ensuring hassle-free use and energy efficiency.
  • Constructed from durable, weather-resistant materials, these lights withstand outdoor conditions and enhance home aesthetics.
  • Easy DIY installation requires no wiring, making it accessible for various outdoor spaces.
  • The built-in batteries can last up to 2 nights on a full charge, supporting sustainable energy practices.

Overview of Solar Cap Lights

solar powered outdoor lighting solutions

Solar cap lights are a stylish and functional addition to any outdoor space. These innovative lights, like the Luna II Solar Post Cap Light, provide an eco-friendly lighting solution that enhances your garden or patio with a sleek, modern design.

You'll appreciate how they deliver 50 lumens of illumination, creating an inviting atmosphere for evening gatherings. In addition to their aesthetic appeal, these lights can contribute to a sustainable camping experience, as they utilize renewable energy sources, aligning with Leave No Trace principles.

One of the standout features of solar cap lights is their automatic dusk-to-dawn operation. This means you won't have to worry about turning them on or off; they harness solar energy through high-grade monocrystalline panels, ensuring efficiency.

Their robust battery life allows for up to two nights of illumination on a full charge, so you'll still enjoy consistent lighting during cloudy weather.

Moreover, these lights are designed to withstand various outdoor conditions. With durable construction made from weather-resistant materials, they'll hold up against rain, wind, and sun.

Advertisement

Installation is a breeze, requiring no electrical wiring. This user-friendly setup allows you to easily add them to standard post sizes, making solar cap lights a practical choice for anyone looking to elevate their outdoor lighting experience.

Key Features and Benefits

essential attributes and advantages

When you choose solar cap lights like the Luna II, you're not just enhancing your outdoor space; you're also making an eco-friendly choice.

With the rise of solar energy applications, its efficient solar panel and automatic functionality save energy and reduce your carbon footprint. Investing in affordable solar panels not only helps the environment, but it also provides long-term cost savings on energy bills. With advancements in technology, the price of solar panels has become more affordable for homeowners and businesses alike. By utilizing solar energy, individuals and companies can take a proactive step towards reducing their carbon footprint and contributing to a more sustainable future.

Plus, the stylish design complements your home while providing essential lighting for safety and ambiance.

Eco-Friendly Energy Efficiency

Harnessing the power of the sun, these eco-friendly solar cap lights offer an innovative solution for energy-efficient outdoor lighting. By utilizing high-grade monocrystalline solar panels, they efficiently capture solar power and convert it into illumination without relying on external electricity sources.

These lights not only enhance your outdoor ambiance but also contribute to eco-friendly lighting practices which can help reduce overall energy consumption.

Advertisement

  • 360° light spread with integrated GS patented solar bulb technology
  • Minimal energy consumption with light outputs up to 50 lumens
  • Automatic dusk-to-dawn functionality for seamless operation
  • Batteries that last up to 2 nights on a full charge
  • Low maintenance, eliminating the need for wiring and reducing installation costs

These features guarantee that you enjoy bright, sustainable lighting while promoting energy efficiency in your outdoor spaces.

Plus, the low maintenance aspect means you won't have to worry about frequent battery replacements or complicated installations.

With solar cap lights, you get a reliable lighting solution that not only illuminates but also supports eco-friendly lighting practices.

Embrace this sustainable choice and transform your outdoor areas into beautifully lit spaces, all powered by the sun.

Stylish Outdoor Aesthetics

Transforming your outdoor space into a stylish sanctuary is effortless with the Luna II Solar Post Cap Light. These solar lights boast an elegant design that not only enhances the aesthetics of your property but also provides environmentally friendly lighting.

With their sleek, modern look, they fit seamlessly into any outdoor decor, adding a touch of sophistication. Incorporating these lights can complement natural materials that are essential in modern farmhouse decor, enriching your outdoor style.

Advertisement

The Luna II features a light output of 50 lumens, paired with a patented solar bulb that casts a 360° light spread. This creates a warm and inviting ambiance in your garden or along pathways, ensuring your space looks beautiful both day and night.

Made from durable, weather-resistant materials, these lights are built to withstand the elements, guaranteeing long-lasting performance and aesthetic appeal.

You'll appreciate the easy DIY installation, which allows you to upgrade your outdoor aesthetics without any complicated wiring. Plus, with dusk-to-dawn automatic functionality, these solar lights enhance visibility while reducing electricity costs and your carbon footprint.

Invest in the Luna II Solar Post Cap Light and elevate your outdoor space with stylish outdoor aesthetics that you—and the environment—will love.

Product Comparisons

analyzing product differences effectively

Comparing solar cap lights can help you choose the best option for your needs. Here are some key factors to take into account:

  • Light Output: The Luna II Solar Post Cap offers 50 lumens, while GreenLighting's model shines brighter with advanced SMD LEDs. Understanding the importance of essential items for survival can also enhance your outdoor experience, especially during emergencies when reliable lighting is vital.
  • Design: Luna II has a modern design, perfect for contemporary outdoor spaces, whereas GreenLighting features a more traditional look.
  • Battery Life: The Luna II lasts up to 2 nights on a full charge, but GreenLighting offers 8 to 10 hours of illumination, ideal for longer evenings.
  • Installation: Both options require no electrical wiring, making installation a breeze and ensuring convenience.
  • Pricing: At $139.99 for a 2-pack, Luna II may seem pricier, but GreenLighting's 12-pack at the same price is a better choice for larger areas.

Customer Reviews and Experiences

feedback and user insights

When you consider purchasing solar cap lights, customer reviews can provide valuable insights into their real-world performance. The GreenLighting Standard Solar Post Cap Lights boast a rating of 4.1 out of 5 stars from 1,735 reviews, indicating a generally positive user experience. Many customers appreciate how these solar post lights deliver excellent ambient lighting and fit various post sizes with ease.

It's crucial to set a budget for this purchase to guarantee it aligns with your financial goals, especially if you plan to invest in multiple units. Additionally, considering the potential long-term savings on electricity, these lights can even contribute to your overall budgeting strategy.

Advertisement

However, not all customer experiences are positive. Some users have reported issues like the lights turning yellow after just three months, reduced brightness, and battery failures, raising concerns about durability. While these outdoor lights are designed to withstand the elements, mixed reviews highlight the importance of managing expectations regarding longevity and performance.

Despite some drawbacks, the popularity of these solar cap lights is evident, as they rank #37,860 in Tools & Home Improvement and #34 in Decking Caps on Amazon.

Ultimately, it's important to weigh both the positive feedback about ambiance and ease of installation against the reports of durability issues. This balanced perspective will help you make an informed decision before investing in solar cap lights for your outdoor space.

Installation and Maintenance Tips

effective installation and maintenance

Customer reviews highlight both the benefits and potential issues with solar cap lights, making it important to evaluate their installation and maintenance for peak performance.

To guarantee you're getting the most out of your solar cap lights, consider how environmental factors, similar to air quality considerations for air purifier maintenance, can impact their effectiveness.

Here are some essential tips to make certain your solar cap lights shine brightly:

Advertisement

  • Choose a location with ample sunlight for maximum solar panel charging.
  • Installation is usually a straightforward DIY project—just place the solar cap on the post.
  • Regularly clean the solar panels with a soft cloth to maximize sunlight absorption.
  • Periodically check and replace the batteries; most models use GS32V15 batteries, lasting up to two nights on a full charge.
  • Confirm your lights are weather-resistant and properly fitted to prevent water accumulation.

Why Choose Solar Lighting?

benefits of solar lighting

When you choose solar lighting, you're opting for energy efficiency and reducing your electricity bills.

These environmentally friendly solutions not only enhance the aesthetics of your outdoor spaces but also contribute to a sustainable future by utilizing renewable energy sources.

These lights are easy to install, requiring no complicated wiring.

Plus, with their durable designs, you can enjoy beautiful lighting without worrying about harsh weather conditions.High-quality content boosts credibility and trustworthiness.

Energy Efficiency Benefits

Harnessing the power of the sun, solar lighting solutions offer a compelling energy-efficient alternative to traditional outdoor lighting.

By utilizing advanced solar technology, you can dramatically reduce your electricity bills while enhancing your outdoor spaces. These eco-friendly solutions are similar to those in the coffee culture that emphasize sustainability and ethical practices.

Advertisement

Here are some key benefits:

  • Automatic dusk-to-dawn functionality: These lights turn on and off without manual intervention, maximizing energy efficiency.
  • Sustainable energy source: Solar lights convert sunlight into energy, making them eco-friendly and cost-effective.
  • Dependable battery life: With a battery life of up to 2 nights on a full charge, you'll enjoy reliable illumination even in varying weather conditions.
  • Simple installation: The lack of electrical wiring simplifies setup, allowing you to install them anywhere and minimizing energy waste.
  • Designed to withstand the elements: Solar lights are built to endure harsh weather, ensuring long-lasting performance.

Environmentally Friendly Option

Choosing solar lighting not only enhances your outdoor spaces but also supports environmental sustainability. By opting for solar cap lights, you're making an environmentally friendly option that harnesses the power of the sun.

These lights utilize integrated solar panels to capture sunlight, considerably reducing reliance on traditional electricity sources. This shift not only helps decrease your carbon footprint but also promotes sustainable energy practices, similar to how wood pellet fireplaces utilize eco-friendly fuel alternatives to improve efficiency.

With built-in batteries, solar LED lights recharge using absorbed solar energy, which means you can enjoy beautiful outdoor lighting without worrying about electricity bills.

Over time, this leads to substantial cost savings, making solar cap lights a smart investment. Plus, their high weatherproof ratings guarantee that these eco-friendly lighting solutions can withstand various outdoor conditions, delivering consistent performance year-round.

Easy Installation Process

Installing solar cap lights is a breeze, thanks to their user-friendly design that removes the need for complicated wiring. You can complete the installation in minutes without any professional help, making it a perfect DIY project.

Advertisement

Here's why you'll love the easy installation process:

  • No wiring required: Simply place them on your posts and let the sun do the rest.
  • Automatic dusk-to-dawn: These solar post cap lights turn on and off by themselves, providing hassle-free lighting.
  • Versatile compatibility: Most models come with adapters to fit standard post sizes, such as 4×4 and 5×5 PVC/Vinyl posts.
  • Durable construction: Made from weather-resistant materials, they withstand various outdoor conditions for long-lasting performance.
  • Efficient energy collection: High-grade monocrystalline solar panels guarantee that the lights efficiently capture energy during the day.

With solar cap lights designed for easy installation, you'll save time and effort while enhancing your outdoor space with stylish, eco-friendly lighting.

Embrace this convenient solution and enjoy the warm glow of your new lights!

Frequently Asked Questions

Do Solar Post Cap Lights Work?

Yes, solar post cap lights work effectively. They automatically activate at dusk, utilize high-grade solar panels for energy collection, and can illuminate your outdoor spaces for 8 to 10 hours, providing reliable, eco-friendly lighting.

Are Solar Lights Environmentally Friendly?

You'd think solar lights are just another gadget, right? Actually, they're incredibly eco-friendly! By harnessing sunlight, they cut down energy usage, lower your bills, and help the environment—all while looking great in your outdoor space.

How Do You Clean Solar Post Cap Lights?

To clean solar post cap lights, use a soft cloth with mild soap and water. Regularly check the solar panels and remove debris. For tough stains, try a vinegar-water mix, then rinse with fresh water.

Advertisement

Why Do Cheap Solar Lights Stop Working?

Cheap solar lights often stop working due to low-quality batteries, subpar materials, and inefficient solar panels. Moisture can cause corrosion, and without advanced features, they may not turn on or off as intended.

Conclusion

To sum up, solar cap lights not only brighten your outdoor spaces but also help you save the planet. Did you know that using solar energy can reduce your carbon footprint by up to 50%? By choosing these stylish, eco-friendly lights, you're making a difference while enhancing your home's aesthetic. So why wait? Embrace the change, enjoy the savings, and let your outdoor areas shine with sustainable beauty!

Continue Reading

Trending