
Propagating cuttings means taking a piece of a healthy plant, like a stem or leaf, and encouraging it to grow roots so you can create a new plant. You start by choosing a strong, disease-free plant, then cut a healthy stem and plant it in soil or water. Keep it in the right environment with plenty of light and moisture. If you want to master this simple method, a few easy tips can help you succeed.
Key Takeaways
- Propagating cuttings means taking a piece of a plant to grow a new one from it.
- Healthy stems or leaves are cut, then roots develop from the cut area.
- Use clean tools and sometimes root hormones to help roots grow faster.
- Keep the cutting in moist soil with bright, indirect light for best results.
- Once roots are established, transplant the new plant into a bigger pot or garden.
plant propagation root hormone
As an affiliate, we earn on qualifying purchases.
As an affiliate, we earn on qualifying purchases.
What Does Propagating Cuttings Mean?

Have you ever wondered how gardeners quickly create new plants from existing ones? Propagating cuttings means taking a piece of a plant, like a stem or leaf, and encouraging it to grow into a new, independent plant. This method relies on a plant hormone called auxin, which promotes root development. Knowing the right propagation timing is vital; if you cut too early or too late, the cutting may not develop roots properly. When done correctly, this process allows you to clone your favorite plants efficiently, saving money and space. Proper timing is essential for successful propagation, as it influences root growth and overall plant health. By understanding what propagating cuttings means, you can start expanding your garden with ease, using simple techniques that harness natural growth signals and timing to produce healthy new plants.
succulent propagation kit
As an affiliate, we earn on qualifying purchases.
As an affiliate, we earn on qualifying purchases.
Choosing the Right Plants to Propagate
Not all plants are ideal for propagation, so you need to pick the right types. Look for healthy, vigorous plants that respond well to cuttings, like succulents or certain shrubs. Choosing the right plants and healthy cuttings sets the foundation for successful propagation. Additionally, understanding the cultural impact of plant choices can help inform which species will thrive best in your environment.
Suitable Plant Types
Selecting the right plants to propagate is essential for successful cuttings, as not all species root easily or reliably. Ideal candidates include succulent varieties, which tend to develop roots quickly due to their thick, water-storing stems. Flowering plants can also be good choices, especially those known for easy propagation like pothos, ivy, or geraniums. These plants generally produce healthy cuttings that root quickly when given proper conditions. Avoid plants with woody stems or those that require specialized care beyond simple cuttings. Focus on species that naturally propagate through stem or leaf cuttings, increasing your chances of success. By choosing suitable plant types, you set yourself up for a smooth propagation process and a thriving new plant.
Healthy Cutting Selection
Choosing healthy, vigorous plants is essential for successful propagation, as strong cuttings are more likely to develop roots and grow into healthy new plants. When selecting plants, look for those free from signs of plant disease, such as spots, mold, or wilting. Avoid cuttings from infected or pest-infested plants, as these issues can spread and hinder root development. Healthy plants with robust stems and healthy leaves are better candidates because they’re less vulnerable to pests and diseases during rooting. Proper pest management before taking cuttings reduces the risk of infestations that can weaken or kill new plants. By choosing strong, healthy plants, you set a solid foundation for successful propagation and minimize problems caused by pests and plant diseases. Preventing plant diseases is a key step to ensure your new plants thrive from the start.
plant cutting tools set
As an affiliate, we earn on qualifying purchases.
As an affiliate, we earn on qualifying purchases.
Gathering the Tools and Materials You Need
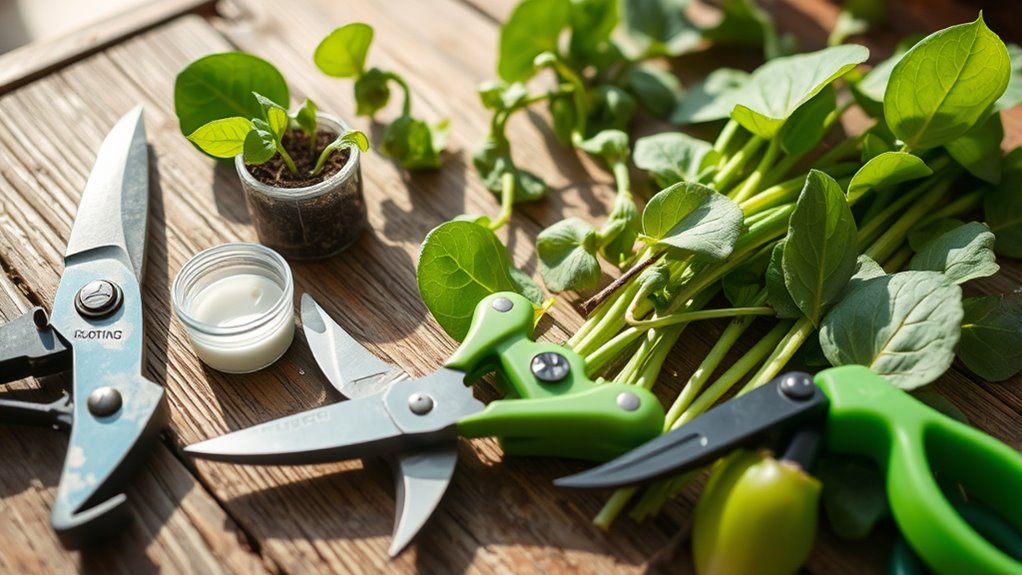
Before you start propagating, gather the right tools and materials to make the process smooth. You’ll need sharp pruning shears, rooting hormone, and clean containers, among other essentials. Having everything prepared saves time and helps ensure successful cuttings. Consider using self watering plant pots to maintain consistent moisture levels during propagation, which can improve success rates.
Choosing the Right Tools
To successfully propagate cuttings, you need to gather the right tools and materials. Start with sharp, clean pruning shears or a knife to make clean cuts that prevent damage and disease. A rooting hormone can boost success, so have some ready. Use a container or pot with drainage holes to prevent waterlogging, which can lead to root rot. A spray bottle helps keep the cutting moist without overwatering. When choosing tools, consider how they’ll affect your garden decor—selecting attractive pots and equipment makes the process more enjoyable. Also, keep pest control in mind; using sterilized tools reduces the risk of transmitting pests and diseases. Having the right tools ready ensures a smooth propagation process and healthier plants from the start.
Gathering Essential Materials
Gathering the essential materials is a vital first step in successful propagation. You need the right tools and supplies to ensure healthy cuttings. Start by identifying your plant correctly, as this guides proper care and soil preparation. Collect sharp pruning shears, rooting hormone, pots, and quality soil. To help organize, here’s a quick overview:
| Material | Purpose |
|---|---|
| Plant identification | Confirm species for proper care |
| Soil preparation | Create ideal environment |
| Rooting hormone | Promote root growth |
| Sterilized tools | Prevent disease transmission |
Having these materials ready guarantees you can focus on proper cutting techniques and soil conditions, increasing your chances of successful propagation. Proper selection of unique and wicked planters can also enhance the display of your propagated plants.
indirect light grow light for plants
As an affiliate, we earn on qualifying purchases.
As an affiliate, we earn on qualifying purchases.
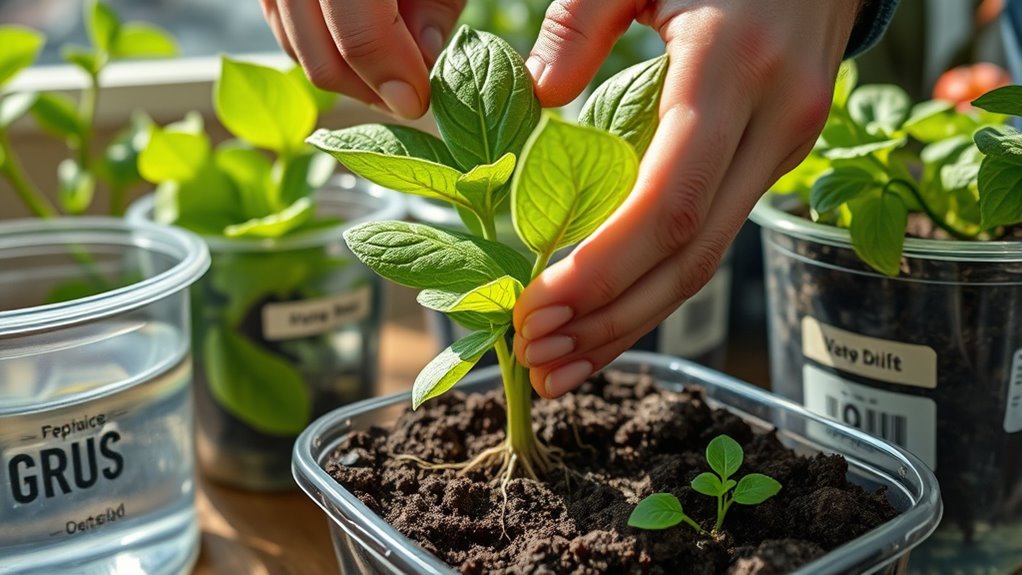
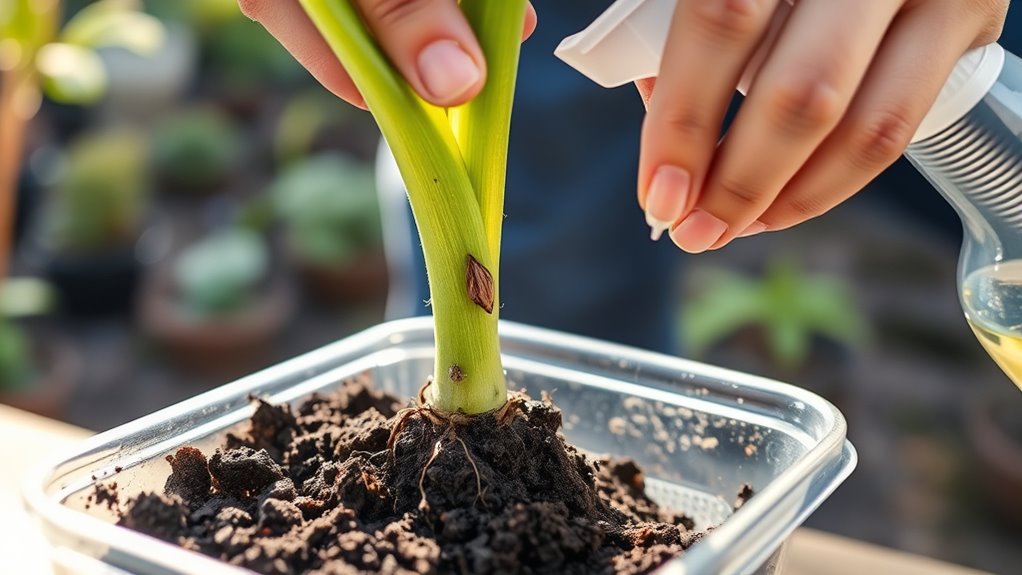
Preparing Your Cutting for Propagation
Preparing your cutting for propagation involves selecting healthy, vigorous stems and making precise cuts to encourage root development. First, choose a stem with no signs of disease or damage. Second, cut just below a node using clean, sharp scissors or pruning shears. Third, remove leaves near the cut end to prevent rot and improve airflow. Fourth, dip the cut end into rooting hormone if desired. Before planting, ensure soil preparation is ideal—use well-draining soil and maintain a consistent watering schedule. Proper soil moisture helps roots form without overwatering, which can cause rot. Additionally, understanding the foraging range of plants can help identify optimal collection sites for healthy cuttings. With these steps, your cutting is ready to be planted and will have the best chance to develop strong roots.
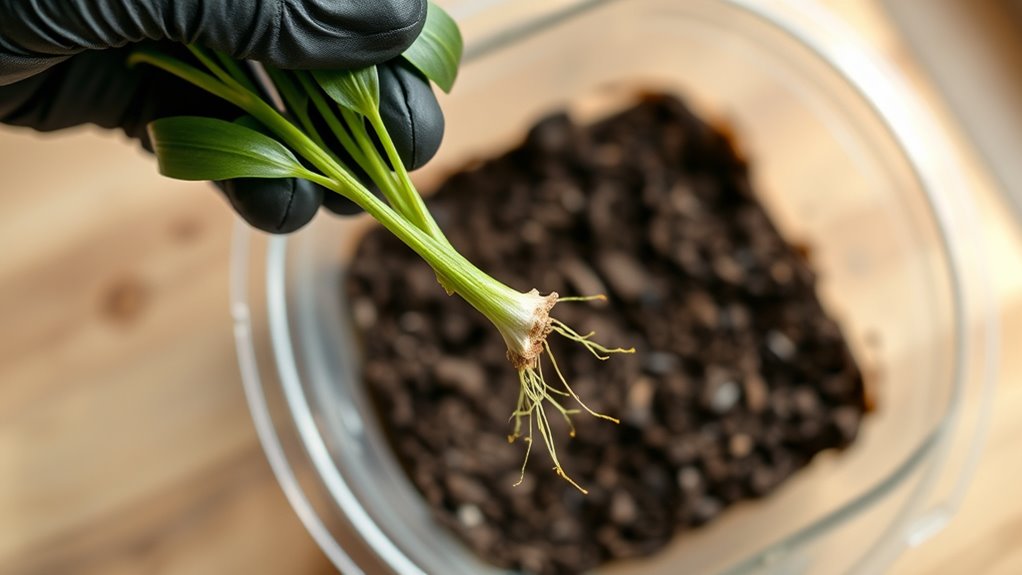
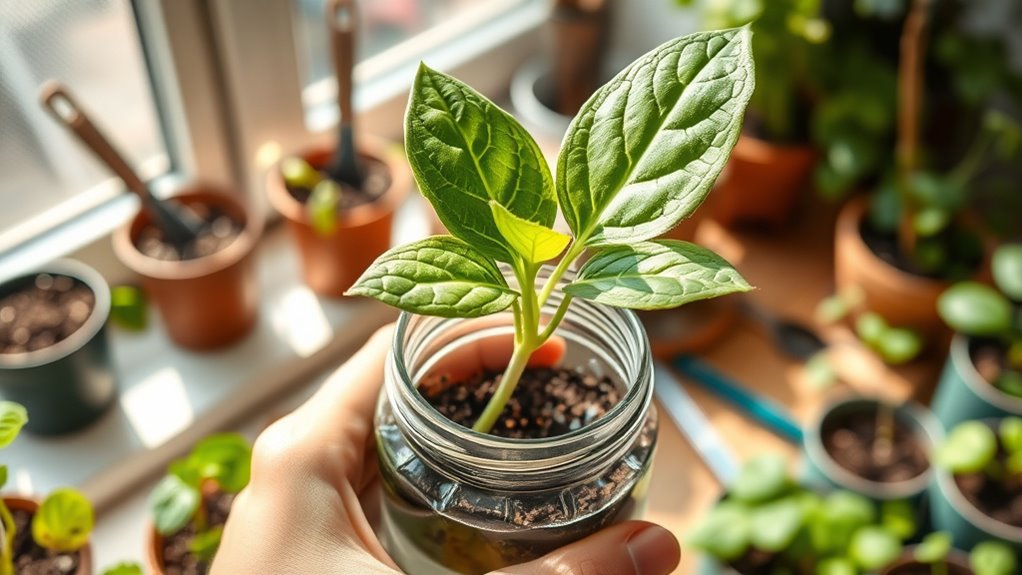
Rooting the Cutting in Soil or Water
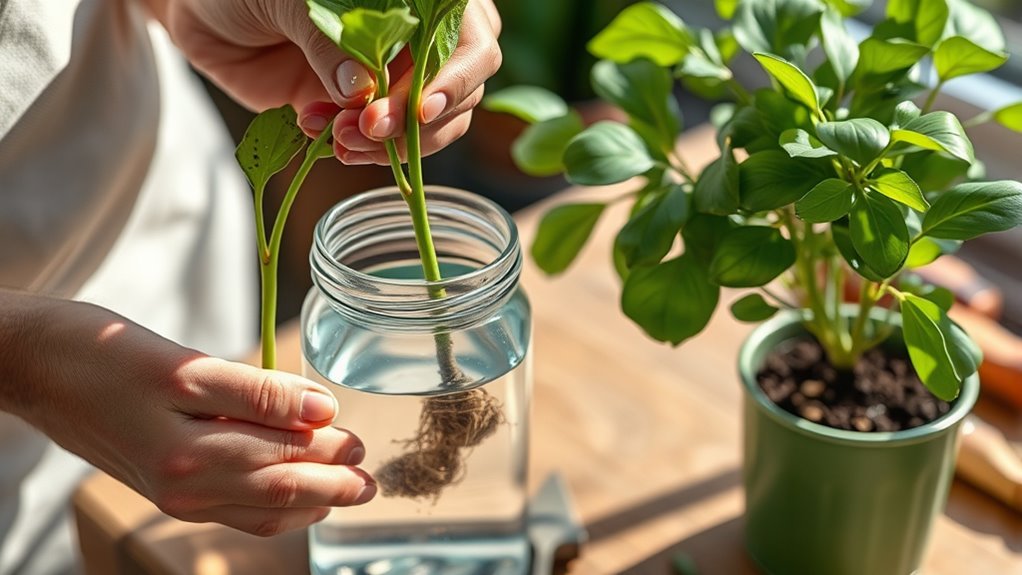
You can start rooting your cutting either in water or directly in soil, depending on your plant type and personal preference. Water-based propagation involves placing the cutting in a clear container filled with water, allowing you to easily monitor root development. This method works well for plants like pothos or basil. Soil rooting methods, on the other hand, involve planting the cutting directly into moist soil, which supports steady root growth and reduces transplant shock. Some plants root faster in water, while others prefer soil. Consider your plant’s needs and your comfort level. Both approaches have their advantages, but make sure to keep either the water or soil consistently moist to encourage healthy root development. Additionally, understanding the propagation process can help you choose the best method for your specific plant.
Providing the Proper Environment for Growth

Once you’ve established healthy roots, providing the right environment is key to ensuring vigorous growth. First, make sure your soil has balanced nutrients—adding compost or fertilizer helps maintain ideal soil nutrients. Second, place your cutting where it gets the right sunlight requirements; most plants thrive with bright, indirect light. Third, maintain consistent moisture without overwatering to prevent root rot. Fourth, keep the temperature steady, avoiding drafts or extreme cold. These steps create a stable environment that encourages roots to grow stronger and faster. By paying attention to soil nutrients and sunlight requirements, you give your plant the foundation it needs to flourish, leading to a healthy, thriving new plant.
Caring for and Monitoring Your New Plant
After your plant has established healthy roots, regular care and vigilant monitoring are *essential* to *guarantee* it continues to thrive. Keep an eye on watering frequency—water only when the top inch of soil feels dry to prevent overwatering, which can lead to root rot. Check your plant daily for signs of pests like aphids or spider mites, and watch for diseases such as mold or leaf spots. Remove any affected leaves and treat infestations promptly with appropriate solutions. *Make certain* the plant gets adequate light and avoid sudden temperature changes. Consistent monitoring helps you catch issues early, so your new plant remains healthy and strong. Proper care during this stage sets the foundation for its long-term growth and *vitality*.
Transplanting Your Rooted Cutting to Its Final Spot

With your rooted cutting showing healthy growth, it’s time to move it to its permanent spot. Before transplanting, gently loosen the soil around the roots. Use rooting hormones to encourage strong root development if needed. Follow these steps:
- Choose a well-draining location with suitable sunlight.
- Dig a hole twice as wide as the root ball.
- Carefully remove the cutting from its container, avoiding damage.
- Prune any damaged roots and use pruning techniques to shape the plant if necessary.
Gently place the cutting in the hole, fill with soil, and water thoroughly. Keep the soil moist and avoid direct harsh sunlight initially. Proper pruning and using rooting hormones will help your plant settle in and thrive in its final spot. Remember to monitor soil moisture and ensure the plant is not stressed during its initial adjustment period.
Troubleshooting Common Propagation Problems
Propagation can sometimes present challenges, even when you follow all the steps carefully. Common issues include poor root development or wilting cuttings. To troubleshoot, check soil drainage; soggy soil causes root rot, while dry soil stalls growth. Make sure your cuttings receive adequate sunlight exposure—too little sun weakens them, too much causes stress. Properly selecting and preparing your plant cuttings, such as using healthy, disease-free material, can also greatly improve success rates plant health.
Frequently Asked Questions
How Long Does It Take for Cuttings to Root Successfully?
It typically takes 2 to 8 weeks for cuttings to root successfully, depending on the plant type. To speed up rooting, use rooting hormones to encourage root development and keep the soil moist without waterlogging. Consistent soil moisture is vital, as it helps prevent the cutting from drying out. Check regularly for roots forming, and be patient—most cuttings will develop strong roots within this timeframe.
Can All Plants Be Propagated Using Cuttings?
Think of plant propagation like matchmaking—some plant species are eager to find a new home through cuttings, while others prefer seeds or bulbs. Not all plants can be propagated using cuttings, as each species has its preferred propagation methods. You’ll find that many woody and succulent plants respond well to cuttings, but delicate or flowering plants might need different techniques. Always research your specific plant species to choose the best propagation method.
What Are the Signs of a Healthy Versus Failing Cutting?
A healthy cutting shows signs of strong root development, vibrant leaves, and steady growth, indicating good plant nutrition. You’ll notice new roots emerging and leaves staying lush without wilting. Failing cuttings often have yellowing or browning leaves, weak or rotting roots, and no new growth, signaling poor root development or nutrient deficiencies. Keep an eye on these signs to guarantee your cuttings thrive or adjust care accordingly.
Is It Better to Propagate Cuttings During a Specific Season?
Think of your cutting as a young sapling yearning for growth—timing is everything. You’ll find it’s best to propagate during seasonal timing that offers ideal conditions, like spring or early summer, when warmth and moisture nurture new roots. During these seasons, the soil and air provide the right environment, giving your cutting the strength and vigor it needs to thrive. Skip the off-season, and your chances of success may dwindle.
How Do I Prevent Pests and Diseases During Propagation?
To prevent pests and diseases during propagation, you should start with clean tools and sterile pots. Use pest prevention methods like neem oil or insecticidal soap to keep bugs away. Make certain good airflow and avoid overwatering, which helps with disease management. Regularly inspect your cuttings for early signs of pests or infections, and remove any affected parts immediately. Keeping your workspace clean and dry is key to healthy propagation.
Conclusion
Now that you know how to propagate cuttings, why not give it a try? Imagine nurturing a tiny stem into a flourishing plant, watching it grow stronger each day. With patience and care, you’ll see your new plant thrive, bringing beauty and life to your space. So, are you ready to get your hands dirty and start propagating? Your green thumb is just waiting to blossom—happy planting!