
For quiet, even cooling, mount your mini-split head on an interior wall about 7 to 8 feet above the floor. Choose a central spot to guarantee balanced air distribution, keeping it clear of furniture, drapes, heat sources, and direct sunlight. Avoid mounting in corners or high-traffic areas to reduce noise and airflow disruption. Proper placement is key for efficiency and comfort—continue exploring to discover tips that make installation even better.
Key Takeaways
- Mount the unit at 7 to 8 feet above the floor for optimal airflow and noise reduction.
- Place the indoor head centrally on an exterior wall to ensure even air distribution.
- Keep away from heat sources, direct sunlight, furniture, or drapes that can obstruct airflow.
- Use adjustable louvers to direct airflow away from occupied areas and electronics.
- Secure the unit firmly to minimize vibrations and avoid mounting in weak or unstable walls.
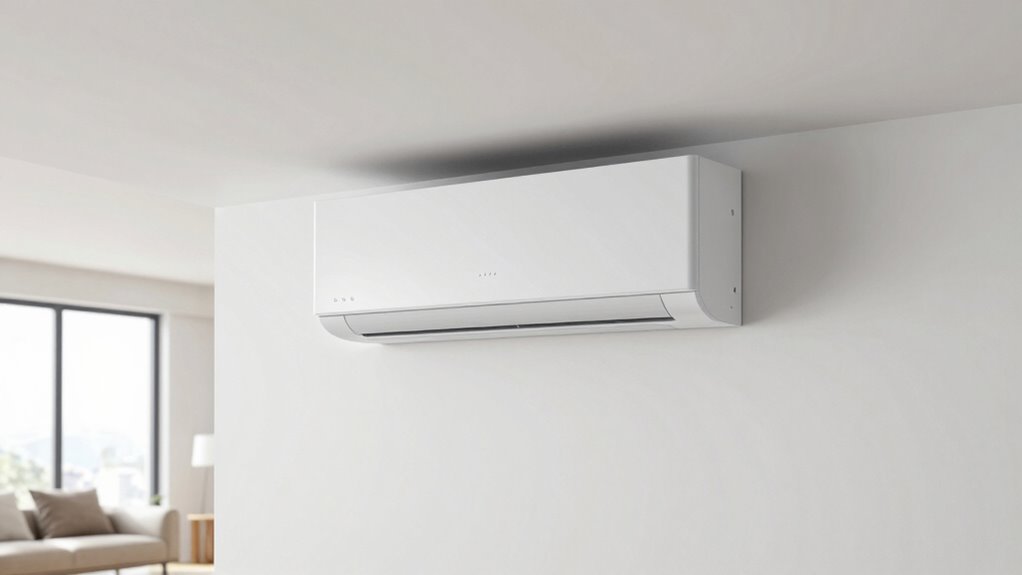
Mounting a mini-split head is a straightforward process that can considerably improve your home’s comfort and energy efficiency. If you’re considering a diy installation, understanding the best spots for mounting is vital for achieving quiet, even cooling. The key is to find a location that promotes ideal placement, ensuring the unit operates efficiently while minimizing noise and drafts.
First, focus on positioning the mini-split head in a central area of the room. This helps distribute cool air evenly, preventing hot spots and ensuring consistent comfort. Avoid corners or areas near heat sources like ovens, radiators, or direct sunlight, as these can interfere with the unit’s ability to regulate temperature effectively. Also, steer clear of mounting the head directly above furniture or drapes, which can obstruct airflow and reduce cooling efficiency.
Position the mini-split centrally, away from heat sources, furniture, and obstructions for optimal comfort and efficiency.
When choosing the height, aim for the unit to be installed approximately 7 to 8 feet above the floor. This height allows the cool air to circulate naturally and helps keep noise levels down. Mounting too high might reduce airflow, while mounting too low could cause the unit to be more noticeable and potentially louder. Keep in mind that the location should also allow for easy access to the condensate drain and electrical connections, simplifying maintenance and troubleshooting.
The wall material plays a role in ideal placement as well. For drywall or plaster, locate studs or use suitable anchors for secure mounting. For brick or concrete walls, you’ll need appropriate anchors and a drill capable of handling these materials. Properly securing the indoor unit ensures stability and reduces vibration, which can contribute to noise. It’s important to avoid mounting the head on thin or weak walls that might not support its weight over time, leading to potential wobbling or damage.
Additionally, consider the direction of airflow. Many mini-split heads have adjustable louvers, so choose a position where you can direct the airflow away from occupied areas or sensitive items like electronics. This not only enhances comfort but also reduces noise perception, making the unit quieter during operation. Ensuring proper installation techniques can significantly impact the longevity and performance of your mini-split system.

DuctlessAire Outdoor Wall Bracket – Mini Split Mounting Bracket – Ductless Air Conditioner Wall Mount – Mini Split AC/Heating System Accessories for Window AC, HVAC, Heat Pump & More (9000-36000 BTU)
UNIVERSAL COMPATIBILITY: The DuctlessAire Outdoor Wall Bracket is designed to support mini split systems ranging from 9,000 to…
As an affiliate, we earn on qualifying purchases.
As an affiliate, we earn on qualifying purchases.
Frequently Asked Questions
Can Mini-Split Heads Be Installed in Outdoor Locations?
Yes, you can install mini-split heads outdoors, but you should consider outdoor placement carefully. Position the unit in a shaded, sheltered spot to reduce noise considerations and shield it from weather elements. Make sure it’s mounted securely to prevent vibrations and noise transfer to nearby areas. Proper outdoor installation ensures quiet operation while maintaining efficient cooling and heating performance, giving you comfort without disturbing your surroundings.
How Does Ceiling Height Affect Mini-Split Head Placement?
Think of ceiling height as the stage for your mini-split performance—higher ceilings need strategic placement to achieve airflow optimization. You should mount the head lower in rooms with tall ceilings to ensure even cooling and quiet operation. Conversely, in rooms with standard or lower ceilings, mounting the unit higher helps distribute air evenly. Proper placement considers ceiling height, maximizing comfort while maintaining noise levels low.
Are There Aesthetic Considerations for Mini-Split Head Mounting?
You should consider aesthetic balance and wall integration when mounting a mini-split head. Choose a location that blends well with your decor, avoiding focal points or cluttered areas. Keep the unit at a height that’s unobtrusive yet effective for even cooling. Select a color that matches or complements your wall paint or decor. Proper placement guarantees the unit stays discreet, enhances your space’s look, and maintains efficient airflow.
What Tools Are Needed for Proper Installation?
You’ll need a drill, level, screwdriver, and possibly a stud finder for proper installation. Mount the mini-split head at the recommended height, making certain it’s not too high or low for ideal airflow and comfort. Use vibration dampening mounts to reduce noise and vibrations, enhancing quiet operation. Measure carefully, keep the unit level, and securely fasten it to prevent rattling. These tools and steps guarantee efficient, quiet, and evenly distributed cooling.
Is Professional Installation Necessary for Optimal Performance?
Professional installation isn’t always necessary, but for peak performance, it’s highly recommended. DIY installation might save you some initial cost, but it can lead to issues like improper mounting or refrigerant leaks, affecting efficiency and longevity. Skilled technicians ensure correct setup, reducing future repairs. Considering cost considerations, investing in professional help can save you money and hassle in the long run, ensuring your mini-split runs quietly and cools evenly.

YANWEI Air Conditioner Deflector,Adjustable Retractable Blinds Suitable for Mini split AC/Heating System,Enhance Cooling and Heating Circulation,Compatible for Daikin、Carrier、Gree、senville、COSTWA
【High Compatibility】 The air conditioning deflectors are freely retractable and can be used on all split air conditioning…
As an affiliate, we earn on qualifying purchases.
As an affiliate, we earn on qualifying purchases.
Conclusion
Now that you know the best spots to mount your mini-split head, think of it as planting a seed for comfort. When placed correctly, it’ll grow into a steady, whisper-quiet breeze that cools your space evenly. Just like a well-tended garden blooms beautifully, a well-mounted mini-split ensures peaceful, consistent cooling. With a little care and attention, your home will feel like a revitalizing oasis, no matter how hot it gets outside.
DuctlessAire Outdoor Wall Bracket – Mini Split Mounting Bracket – Ductless Air Conditioner Wall Mount – Mini Split AC/Heating System Accessories for Window AC, HVAC, Heat Pump & More (9000-36000 BTU)
UNIVERSAL COMPATIBILITY: The DuctlessAire Outdoor Wall Bracket is designed to support mini split systems ranging from 9,000 to…
As an affiliate, we earn on qualifying purchases.
As an affiliate, we earn on qualifying purchases.

TOGGLER SnapSkru SPM Mini Self Drilling Drywall Anchor, Glass Filled Nylon, Made in USA, Heavy Duty Dry Wall Plastic Anchors for #6 to #8 Fasteners, (Pack of 6 with Screws)
SELF-DRILLING INSTALLATION TOGGLER self drilling dry wall anchors install easily into 3/8" to 5/8" thick drywall ceilings and…
As an affiliate, we earn on qualifying purchases.
As an affiliate, we earn on qualifying purchases.